Turn on your Christmas lights the smart way
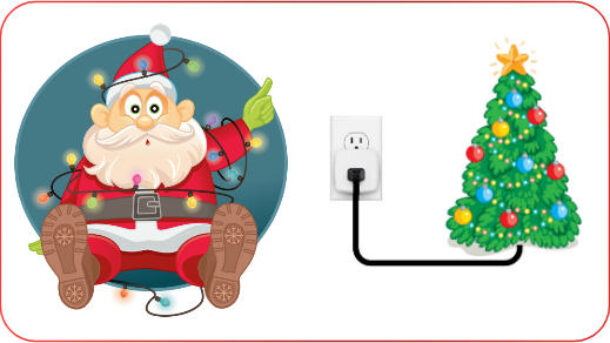
Are you tired of crawling under your Christmas tree to plugin the lights? Or wish your Christmas lights would turn on and off by themselves at certain times? Well you’re in luck as we will show you exactly how you can do this without breaking the bank.
Indoor Christmas Tree Lights
You can easily turn on/off your Christmas tree lights by using a smart plug from HBN. What are Smart Plugs? These are inexpensive devices that plug into a normal household receptacle and can be turned on or off using your phone/tablet , by setting timers or by voice commands (if you have Alexa or Google Home).
We recommend using the HBN Smart Plug Smart Plug for the following reasons:
- Is electrically certified for use in the USA and Canada. You will find that all smart plugs are not certified by a recognized authority.
- Provides a full 15 Amps. Some less expensive plugs only provide 10 Amps or less which will not work with higher wattage devices.
- Great quality at a reasonable price
- Works on your existing 2.4GHz WiFi. No additional equipment needed.
Making the HBN Smart Plug work on your phone
Installing the App on your phone/device will allow you to manually turn the smart plug on/off or have it controlled by the time of day. For example, turn on at 6pm and turn off at 11pm.
Before you begin make sure your phone/device is connected to your 2.4GHz Wi-Fi network.
The following instructions are also available in a video.

- Install the Smart Life App from your App Store. This would be Google Play
 or the Apple store
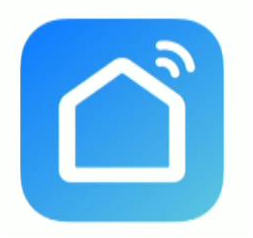
  depending on the type of phone/device you have. The App you need is called Smart Life and will have this icon
  Note: You can also use the HBN app found in the same app stores. The setup will be almost identical to the Smart Life App. Either will work great but in this tutorial we have chosen the Smart life
 - Open the App and it will ask you to log in or sign up. Login if you already have an account or select Sign Up to create one.
- Next you need to read the user agreement and select Agree.
- On the next screen Register by providing your Country and Email address then select Get Verification Code. They will then send you a code by email. Enter the code on the space provided once received. Getting the code should only take a minute or less.
- You will then be asked for a Password. Enter one and select Done.
- We are almost there! Select the Add Device button to add your new smart plug.
- You will then be prompted to allow the App to access your location. Continue then Select “While using the app“.
- A list of devices will be displayed. Select the Socket (Wi-Fi) under the Electrical section.
- Next you need to provide your network name and password. This is needed to enable the smart plug to communicate with the App.
- Select Next and you should be presented with a screen asking you to reset the smart plug (if already plugged in first unplug for 10 seconds then plug it in). Press and hold the reset/power button on the side for 5 seconds. The button/light should start flashing to signify that it’s in the pairing state.
- Select Next then confirm the indicator is Blinking Quickly.
- The app will then begin searching for your smart plug on your network. This could take a minute to complete. When done you will get a screen stating your device was added successfully. Select Done to finish
Congratulations you are now connected to your smart plug and able to control it with the App. You should see a screen with a power button. Pressing this button will turn your smart plug On or Off.
Setting up a Timer for your smart plug
Let’s set a daily On/Off timer for your new smart plug.
- Select the Timer button/link at the bottom of your screen. The Schedule screen will be displayed.
- Select + Add Schedule
- Select the days you want the smart plug to be switch ON.
- Select the time (hour/minute)
- Select the Save button. You should now see the new ON schedule for the smart plug. You can disable this schedule at anytime by sliding the slide switch to Off
- Select + Add Schedule again to add the OFF schedule.
- This time you need to change the action to OFF. Select the ON link and choose OFF from the available options.
- Now set the Days and time as you did in the ON schedule for the OFF times/days. Then select Save.
- You should now see both the On and Off scheduled listed in the schedules list.
- Select the Back arrow at the top left of the screen to return to the main screen.
Naming your Smart plug
When you added your smart plug it was automatically given a default name of Switch 1 or similar. We need to change tis to something more appropriate for your switch.
- To name your new switch select the Edit icon on the top right of your screen.
- Select Device Information
- Enter a new name by selecting the current name then Save
- Select the Back arrow to return to the main screen. Your new name should no be display.
You are now done with the setup. Enjoy your new smart plug. Remember if you run into any problems you can always visit our Community form at https://senexhome.com and post your question.
Frequently Asked Questions (FAQ)
I can't connect my smart plug to my Wi-Fi network
The most common cause for this is that phone is not on the same Wi-Fi network as the smart plug. In order for the smart plug to communicate it must be on your 2.4GHz network. I will not work on a 5GHz Wi-Fi network. You phone must also be on this same 2.4GHz Wi-Fi network.
What happens if I have a power failure?
When there is a power outage in your home, the smart plug will reconnect to your wifi network automatically and will retain all schedules and information configured. However, the plug will remain OFF when the power restores for safety reasons.
Can i use this smart plug to switch high wattage or items with motors?
not exceed the maximum rating of what the timer can handle. Which is rated: 1875W Resistive / 15A, 625W Tungsten / 5A, 1/2 HP
Does this smart plug work with Alexa ?
Yes. This smart plug works with alexa.
Can I use this smart plug with Alexa?
It’s a small device that plugs into a standard home receptacle. You then plugin items like like lamps, appliances into the smart plug. You can then turn the device On and Off by using voice commands, time schedules or manually through a smart app.
Related Articles
Review of the HBN Smart Plug
In this review I will take a look at the HBN Smart plug available from Amazon.


Products Covered in this Article
Author: Phil Ciraolo
I have been in the security industry for over 44 years. During this time I held many positions including installer, service technician and design engineering. Systems worked with include intrusion systems, video surveillance, card access, intercoms and many others. Installations ranged from small residential to large integrated systems. I have walked across overhead cranes, crawled in under floor dirt crawl spaces, hung from 50 foot bucket truck in -10 degree temperatures all with the sole purpose to install security systems. To help with todays App crazy world I also have formal training in software programming and app development. I hope that with my experience I will be able to help you with anything security and home automation related.
Tags: Learn

