Reviews

GENBOLT Outdoor Camera Review

Genbolt Camera Review

GENBOLT Outdoor Camera Review

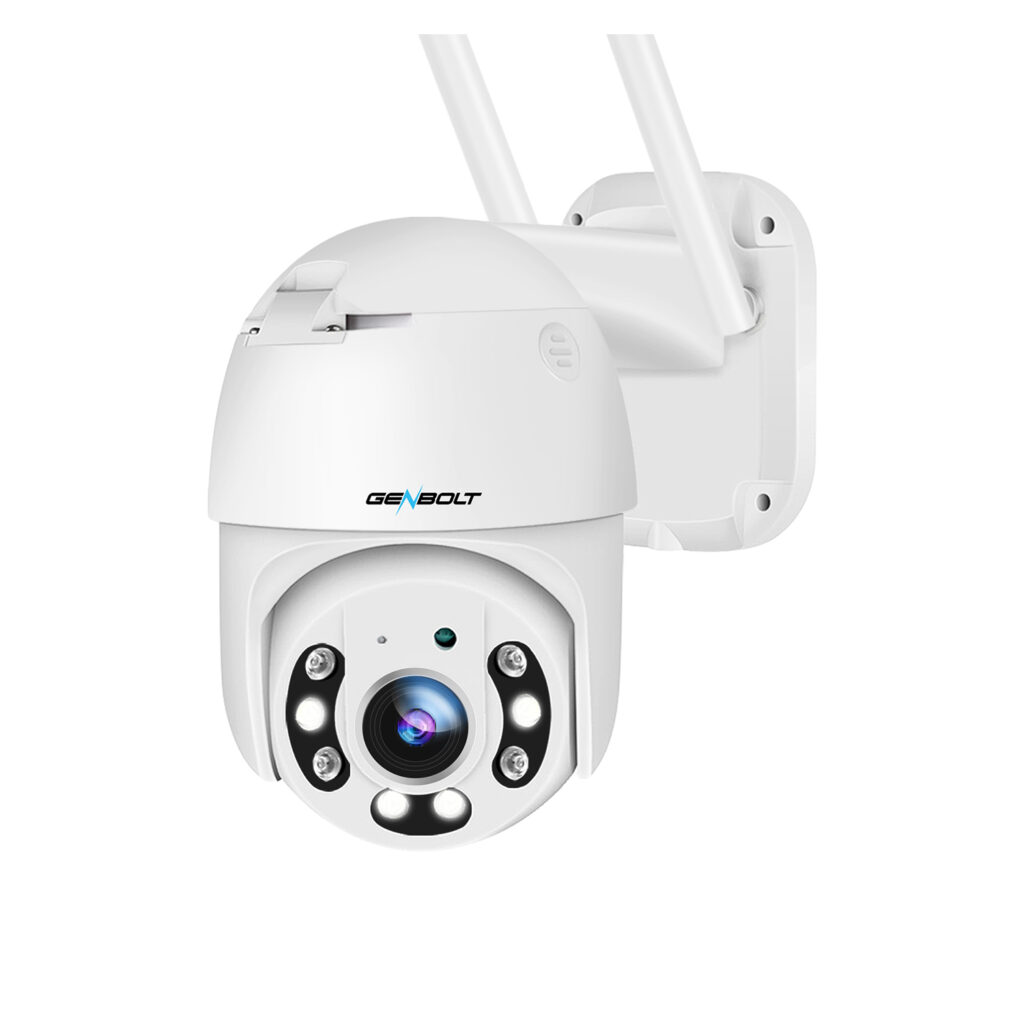
This is an excellent outdoor PTZ security camera with a great design and overall appearance.  

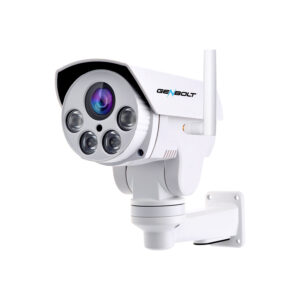
I recently had the chance to unbox and try out the GENBOLT Outdoor Camera GB202 and can honestly say that I was impressed by the construction and overall form.   In this GENBOLT GB202 review, I cover everything you need to know about the basics along with what I consider to be the major pros and cons of this WiFi outdoor camera.

Specifications and Basics

The GENBOLT outdoor camera model GB202 is outdoor rated as IP66 which means it can withstand harsh weather conditions.  An IP66 rating means that it has undergone a 3 minute test of water projected in powerful jets against the enclosure from any direction without causing any harmful effects!  I know if you shot a powerful jets at me for 3 minutes I would certainly have some ill effects.  Anyways I digress. 

The overall size is quite small but you wouldn’t get that from looking at the photos.  It measures approximately 14 x 10 x 12 cm (5.5 x 4 x 4.75 inches).  Some would say this was a mini camera.  I believe it’s a perfect size.  Large enough to be a deterrent and small enough to be aesthetically pleasing.

Overall rotation on the horizontal (Pan) is up to 320 deg and 70 deg on the vertical (Tilt).  This amount of range would be plenty for a field of view in most home or small business applications. 

Communications

The GENBOLT  outdoor camera GB202 can be used with a WiFi network or a hardwired ethernet cable.  I always recommend a hardwired connection where possible. This will provide a better overall user experience.  However, in most applications running cables are difficult so Wi-Fi would be the only option.

The GENBOLT outdoor camera comes with an Enhanced 5dBi WiFi antenna which can provide a range of up to 15m or 50′.  This is in ideal situations with no obstacles between the camera and Wi-Fi router. Your range will vary depending on your particular environment.

The camera only supports the 2.4GHz Wi-Fi band. 5GHz is not possible.  While it’s likely you would be better off using the 2.4GHz anyways (to get the best distance or range), it would have been nice if 5GHz was available in case the camera was close enough to benefit from its use (faster data transmission). 

Using a CAT5 or CAT 6 ethernet cable connection is also an option if you can swing it.   This would give the best overall performance but as we mentioned the most difficult installation. 

For anyone who really feels the need to match the display with their home’s interior design, Amazon offers the unit in white, charcoal, sandstone, deep blue sea and chameleon. There’s also a version with the latter color specifically designed for kids.

Plenty of High-Quality Features
Camera Points

The GENBOLT outdoor camera model GB202 provides a 2MP (1920x1080p) image which these days is not huge but is it does provide sufficient detail for general surveillance.  It would have been nice if this camera provided 4 or 5 MP image at the same great price.

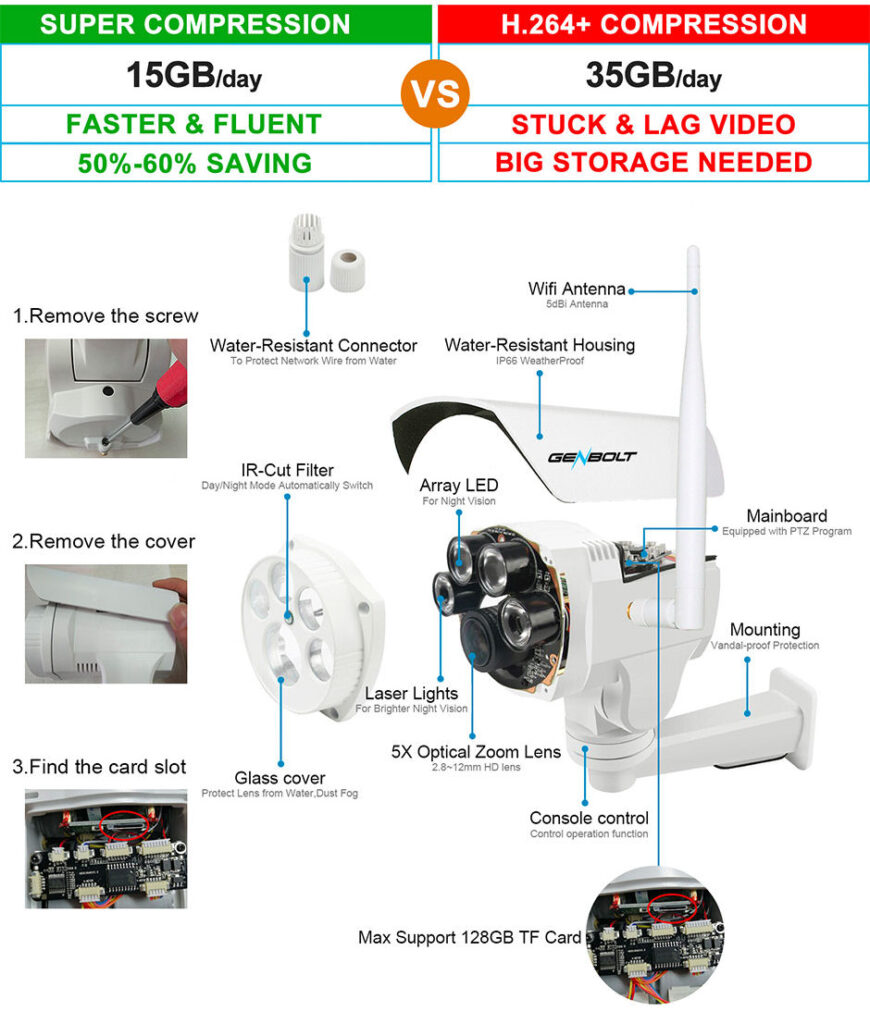
The camera comes with a 2.8-12mm vari-focal lens which is fantastic for camera in this price range.  The 2.8 setting provides a very wide angled view while the 12mm can provide great detail when zoomed in at greater distances.  Best of both worlds.

The camera even has 5x Optical zoom.  Optical zoom  uses a physical change in the lens to adjust the distance between the camera lens and the subject.   This is always the better way to zoom as it provides the best details or image quality.

Digital zoom on the other hand uses technology (software) to manipulating pixels in the image.  While this does provide a larger image it is at the cost of image quality.

The camera does provide an additional 4x Digital zoom on top of the 5x optical zoom. 

The GENBOLT outdoor camera GB202 comes with 8 Presets.  Presets are a great feature in that it allows you to define up to 8 different camera positions that you can call up by simply pressing a button on the app.  For example,  you could create a preset for all your doors, windows or patio. Then when called would move the camera to the same position you set for that particular preset. 

The GENBOLT outdoor camera also comes with an Auto Cruise feature.  When enabled the camera will automatically pan back and forth between presets until you stop it. However, I do not recommend using this feature for long periods.   Leaving this on all the time I believe will wear out the internal gears and mechanism.  I have seen this happen on professional grade systems.  

The camera comes with a Auto focus feature.  When you zoom in it will try to adjust and provide the best focus.  This works but I did find it to be a bit laggy or slow to focus in some situations.  It does eventually find the correct focus.

Night Vison

The GENBOLT outdoor camera GB202 provides above average night vision.  During our test it did provide adequate scenes at the advertised 30M or 100ft .

It accomplishes this by using an array of 4 10 mil IR LEDs. 

Comparing with normal IR LED on other ip cameras, this array of  IR LED’s provides  longer time lifespan and better IR night vision performance.

Recording & Storage

Every camera system needs some sort of recording and storage capability.  The GENBOLT outdoor camera GB202 can be setup to record based on a schedule or by alarm detection events.  I prefer the alarm detection method as this will reduce the amount of storage needed as it records only when something is detected.  Of course you could also set it up to record all the time or by a schedule.

Storage of video events can be done directly on the cameras built-in 32GB TF Card (memory card).  I was surprised to find that they included a built-in card as most manufactures only provide a SD card slot and you have to supply a SD card.  With the built-in card you can start storing your video right away.

However, they also provide a SD card slot so you can add additional storage capability by adding a 32, 64 or 128GB SD card (not provided). 

Playback and searching your stored video was also easy and intuitive .  The App allows you to find your recorded events by using the timeline or by specific dates using the calendar.  

Alarm & Detection

False alarms from standard camera detection can be extremely annoying.  Things like plants moving in the breeze, snow, rain, dog, moth, fog, leaves falling, and lights from cars passing by can cause standard detection systems to false alarm.  The GENBOLT GB202 comes with AI humanoid alarm detection.  The camera sensor will only send you notifications when it detects a humanoid form in the field of view.  This helps to reduce false alarms and the constant annoying notifications.  During my tests I found it to be pretty accurate.

This camera also comes with Intelligent auto tracking technology, the GB202 will track or follow people’s path automatically once they  enter the surveillance area.  This is a very cool feature and I found it to work pretty well during our tests.  However, like any tracking system you can out run the tracking just by moving very fast.  In this scenario the camera will lose track of the person and return to its home position.   However, I would think that most intruders would not be sprinting across the field of view (FOV).

You can also set a schedule for your alarm detection to operate.  For example, you could setup detection to work only between certain hours and specific days. 

Motion detection zones are also available.  This allows you to set a specific area of your view that will generate alarms.  This worked flawlessly.  I could set an area or zone and only if I entered that area would the camera detect and send alarms.   Great for masking out areas that might have movement that you don’t want to detect.

Notifications

The GENBOLT outdoor camera GB202 Wi-Fi camera can notify you of detection events by email and/or by notifications on your phone.    You can set it up to send your multiple live photos with an event occurs.

FAQ

How do you power the camera?

The camera comes with a 12Vdc 1.5amp power adapter that needs to be plugged into a standard household receptacle.  The adapter is not rated for outdoors so it should be placed indoors close to the camera.  Thc cable is approximately 3 meters long but you can also purchase extension cable if needed.

The camera does not support Power over Ethernet (POE)

Do I need a Internet Connection?

Yes . To be able to use the GENBOLT outdoor camera GB202 you will need a WiFi or Ethernet network (hard wired) with Internet connectivity.  

Are there any monthly fees?

No.  No monthly fees if you use the onboard memory card.

Can I mount this on a corner of my house?

Yes.  But you will need to purchase an corner mount bracket.  We have provided a suitable bracket below.

Pro's & Cons

During my review I have identified the following Pros and Cons 

Pros

  • A lot of features at a reasonable price
  • Better than average video storage options
  • IP66 Rated for harsh weather conditions
  • 5x Optical zoom compared to just digital zoom.

Cons

  • No Alexa or Google Home support.  
  • Only 2 MP image compared to many cameras being 4 or 5MP theses days.  
  • Plastic housing compared to more professional grade cameras that use metal

Alternatives

Conclusion

During the testing of the GENBOLT outdoor camera GB202 I found it to be above average for cameras in that price range.  While there is room for improvement, like the smaller image size (2 MP),  not working with smart speakers like Alexa and Google Home and the plastic housing.  I did find overall that this is a good choice for general home surveillance.  With good image quality and above average night vision I don’t think you can wrong with this camera.

Update Feb 17,2023

After using this camera now for a while I just had to post this update with my experience.  In short this camera has exceeded my expectations for a camera in this price range.  It has been very reliable and all the features seem to work as described all the time.  In my experience some other cameras in this range sometimes become quirky with some features stopping to work and/or becoming inconsistent.  Not this camera, it works as it should all the time.  I really like the night vision which actually works as they described.  Overall I very pleased with this camera.

Products Covered in this Article

Amazon Echo Show 5 2nd Generation Review

Featured1

Amazon Echo Show 5 2nd Generation Review

Q? Encoding=Utf8&Amp;Asin=B08Kjn3333&Amp;Format= Sl250 &Amp;Id=Asinimage&Amp;Marketplace=Us&Amp;Serviceversion=20070822&Amp;Ws=1&Amp;Tag=Senex03 20&Amp;Language=En Us

Smart displays have become an everyday part of many people’s homes. These individuals and families appreciate that they can combine the convenience of voice-and-motion-activated assistance with fast access to the content they need to complete daily tasks and enjoy their lives.

Amazon's Echo Series

I recently had the chance to unbox and try out the 2021 Amazon Echo Show 5 (2nd Generation). What can I say other than I consider it an excellent improvement for the most part over the 2019 (1st Generation) model. In this Amazon Echo Show 5 Review, I cover everything you need to know about the basics along with what I consider to be the major pros and cons of this smart display:

Specifications and Basics

The Echo Show 5, a hands-free smart display that flawlessly combines the best parts of Amazon’s Alexa Assistant with a 5.5-inch touchscreen, a 2MP camera and a lot of sensors, has an overall size of 5.8 x 3.4 x 2.9 inches (148 x 86 x 73 millimeters) and a unit weight of 14.5 ounces (410 grams).

As with all Echo displays, it comes with Wi-Fi connectivity. It doesn’t support peer-to-peer networks, but it does support dual-band 802.11a/b/g/n/ac networks and offers wireless connectivity to Bluetooth speakers. It has a 1.65-inch, built-in speaker with audio streaming with Advanced Audio Distribution Profile (A2DP) support and voice control with Audio/Video Remote Control Profile (AV RCP). It also offers both English and Spanish language support.

System compatibility includes web browsers and Amazon Fire OS, Google Android and Apple iOS. All software and security update automatically occur for up to four years after the last available-for-purchase date. It also comes with a standard 1-year, limited warranty. Additionally, Amazon offer several plans for purchasing and extending the warranty up to three years.

Convenience in a Smart Package

The Echo Show 5, which is sometimes also known as the Alexa Show 5, offers all the convenience that you would expect with this type of Amazon product. The device arrives with a 15-watt, 4.9-inch, glacier white, power adapter. You can order the device to arrive standalone or pay extra for a tabletop stand or Blink Mini bundle. As previously noted, the display comes standard with a 2 MP camera and several sensors designed to make voice and movement interactions with it easier.

Users can effortlessly make video calls, interact with news details or a calendar, stream music and shows from their favorite streaming services like Prime Music, Spotify, Apple Music, YouTube, Prime Video or Netflix and set alarms and timers. The smart display also offers preset routine options that you can set so that they activate when the display detects motion or at a particular time of day.

It interacts seamless with your home’s other smart device. For example, you can schedule interior lights to turn on when you enter a room and turn off when you leave the room or exit the house. These features along with other details outlined in a different section of this review make this device extremely eco-friendly. You can also set the lights to come on slowly and weather details to appear onscreen first thing in the morning, which makes it a great alternative to a separate weather alert system or an alarm clock.

For anyone who really feels the need to match the display with their home’s interior design, Amazon offers the unit in white, charcoal, sandstone, deep blue sea and chameleon. There’s also a version with the latter color specifically designed for kids.

Plenty of High-Quality Camera Functionality

With the 2 MP camera and 5.5-inch smart display, it’s easy to make the Echo Show 5 double as a digital photo frame to display photos from different sources as static, rotational or slideshow images. It’s also an excellent way to keep in touch with loved ones who have a similar device.

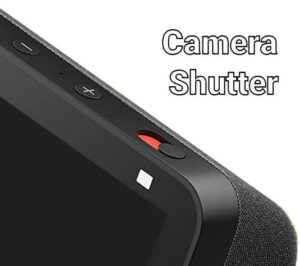
Amazon didn’t scrimp on security features with this unit. The system disables the camera entirely when you select mute or use the off button for the microphone and camera. More importantly (I love this feature), it has a physical, built-in shutter as an additional layer of security and protection to prevent hackers from using the device for spying.

With the 1080P HD indoor Blink Mini, a plug-and-play security camera that features two-way audio and motion sensors, you can monitor any room of your home at any time through the Alexa Show 5. The best part? It’s possible to use the Alexa app to set up a remote, home-monitoring feed. You can use a mobile phone, tablet or computer as a remote viewer through the Alexa Show 5 and any attached cameras. If the sensors detect certain types of sounds or movements, such as movement in what is supposed to be an empty house, the sound of broken glass or the sprinkler system turning on, you receive an immediate alert.

Echo Show Camera Shutter

Everything Kids Need to Learn and Thrive

The Alexa Show 5 is also one of the least expensive secure educational portals for children on the market today. if you’re a parent, you have total access over the parental controls, including filters and blocks designed to protect your children from certain types of content on the internet and different media platforms.

I really like how kids can use the display with the Alexa Assistant to discover answers to common and important questions about the world and life and explore videos, music and other useful educational content. If you don’t want your children underfoot while making preparations for different meals or events, such as holiday and birthday parties, you can set up the Alexa Show 5 in their bedroom.

Q? Encoding=Utf8&Amp;Asin=B08Lmsc4Wz&Amp;Format= Sl250 &Amp;Id=Asinimage&Amp;Marketplace=Us&Amp;Serviceversion=20070822&Amp;Ws=1&Amp;Tag=Senex03 20&Amp;Language=En Us

With an extra Kids+ subscription, you can go one step further and guarantee that your children have access to an extensive library of information that includes games, skills and videos. You can even provide them with access to Audible audio books.

Accessibility Tools That Actually Work

Many people purchase a smart display or similar assistant because they’re dealing with health issues or disabilities that make it difficult for them to fully experience the world without assistance. These tools provide them with a better quality of life. In the past, people with hearing, vision and mobility problems, for example, might need a half dozen or more devices in their home to perform the tasks that the Echo Show 5 does on its own.

People with these and other difficulties can make their lives easier and make more efficient use of their time with the device’s many accessibility tools. The Alexa Show 5 comes standard with closed captioning and Alexa captioning. People with vision difficulties can use a VoiceView screen reader.

The screen also has color inversion and correction options and a magnifier! With internet connectivity, people coping with accessibility issues can also access online tools that offer even greater flexibility and freedom.

Excellent Sound Quality, But...

Speaker

I’ve now reached the point of this review that I have to discuss cons. The truth is that the Amazon Show 5 is near-perfect given its many features and price. It has few downsides. Beyond a smallish screen, the unit has two audio-related problems:

Through the speaker, Alexa is clear as a voice assistant without any strange after “echoes” or digitized sounds. The volume is fantastic. That said, it’s obvious that Amazon focused more on Alexa’s voice-and-speech recognition than on playback of music and other types of audio.

Although you can easily connect to your online playlists and other entertainment via a variety of platforms and Alexa can pick up commands even while music or movies play through it, the playback isn’t the best sound quality on the market. I agree with other reviewers who describe it as slightly “tinny.”

The biggest downside or “but” is that Amazon decided to remove the auxiliary audio 3.5-millimeter jack or port, which means that there’s no option for plugging in a wired headset or speaker with that size plug. Instead, you must depend on wireless connections.

Focus on Tomorrow's World

Recycle Symbol

Many people are worried about the changes humanity is making to the environment. They want to know if the companies they invest in when they buy products and services show the same concern and strive to leave the world a better place. One of the things I like about the Alexa Show 5 is that it has a high post-consumer recycling history. In some ways, it’s more renewable than many similar products.

The display is made with 38% post-consumer plastics and 100% recycled fabric. The power adapter is made of 50% post-consumer plastics. The packaging it arrives in is made of 96% wood-fiber materials from recyclables and carefully managed forests. There’s also an extensive trade-in and recycling program. As a result, you know that your device goes back into the recycling process any time you upgrade to a new model.

Power consumption is another important area to consider. A lot of personal electronics on the market are power hogs during use and vampires that pull leaked energy from outlets in standby mode. When it comes to power consumption, the Alexa Show 5 offers a lower power mode and an energy dashboard designed to make electricity usage more efficient. Amazon has also announced that it’s working to make solar and wind farms available to improve electric utility usage and markets everywhere.

An Affordable Option

Affordable Prices

My main thought about the Echo Show 5 is that it’s a worthwhile, inexpensive deal at approximately $55 before taxes. Even though it has a small 5.5-inch touch screen, it has many potential uses that aren’t hindered too much by the screen’s size. The touch capability and voice-and-motion capabilities are well above average. Many similar smart displays in the market just don’t respond as quickly or as well.

Although it might work in a pinch, I don’t recommend using this display as the main speaker in a kitchen. There are always things to consider when deciding to set up any types of electronic, non-appliance device in a kitchen because of heat and humidity. The greater concern is sound. Music might sound “fine,” but it won’t be at a high enough quality for long-term, prep zone or breakfast-bar or nook enjoyment.

Instead, I think it’s a great secondary system for the living room or a bedroom, especially in a room for kids or an elderly member of the household who has mobility issues and rarely leaves their room. Of course, for the safety of everyone in the home, I highly recommend that you close the 2MP camera shutter or mute the display when it’s not in use to prevent someone from hacking it from outside and breaching your security. That said, when the camera is in use, you definitely get to enjoy much better picture quality than the 2019 1st Generation model.

Lastly, if you already own the 1st Generation Echo Show 5 device, I don’t recommend that you upgrade even though the 2nd Generation is currently so inexpensive since the differences aren’t great enough to make an upgrade worthwhile. The 2nd Generation also doesn’t have that useful aux 3.5-millimeter jack found in the 1st Generation that’s great when you want to plug in a wired headset or even a second wired speaker.

When it’s time to upgrade, there are other models that are far more worth the time and money it takes to make this type of change in your home, such as the Echo Show 10 and Echo Show 15. The latter offers an impressively large screen that’s worth a second look. Amazon does provide simple setup of the Echo Show 5, but you might deal with a significant disruption while you’re trying to set up access to content and sync it with other smart devices in your home. You also need to take extra time to set up additional security cameras.

FAQ

Do you need to pay a monthly fee to use an Echo Show?

No.  There is no monthly fee.  There are optional services like Amazon Music but they are optional.

Do I need a Internet Connection?

Yes . To be able to use an Echo Show you will need a Wi-Fi network in your home.  

Do I need an Amazon account?

Yes.  You will need an Free Amazon account.

Can I use the Amazon Echo Show 5 as a security camera?

Yes.  You can use it as a security camera and monitor the live feed from your home on you smart phone.

Can I make video calls with the Echo Show 5?

Yes.  Echo Show devices can place video calls to other Echo Show devices and the Alexa phone app.

Pro's & Cons

During my review I have identified the following Pros and Cons 

Pros

  • Great price. A very inexpensive way to get started with a smart speaker
  • No monitoring fees or long term contracts
  • Compatible with other smart home devices
  • Integrates with surveillance cameras
  • Built-in security features – physical camera shutter.

Cons

  • Not the best sounding smart speaker on the market.  
  • Screen is a bit small at 5″.  
  • Missing the 3.5mm audio jack found on its predecessor.

Alternatives

Conclusion

All of that said, if you’re looking for a winter holiday gift that your loved ones will appreciate and enjoy day after day, then you don’t need to look any further. It’s an accessible, convenient, fun smart display.

Products Covered in this Article

Other related Products

Specifications

Approx. Size

148mm x 86mm x 73mm (5.8” x 3.4” x 2.9”)

Approx. Weight

410 grams (14.5 oz) Actual size and weight may vary by manufacturing process

Display

5.5” touch screen

Camera

2 MP - built-in security shutter

WiFi connectivity

Dual-band wifi supports 802.11a/b/g/n/ac Wi-Fi networks

Bluetooth connectivity

Audio streaming from your mobile device to Echo Show 5 or from Echo Show 5 to your Bluetooth speaker. Bluetooth speakers requiring PIN codes are not supported.

Audio

Full range 1.65” built-in speaker.

Processor

MediaTek MT 8163

Accessibility features

On Echo devices with screens, you can enable Alexa captioning and closed captioning, magnify the screen, toggle colour inversion, and choose between colour correction options. You can also enable the VoiceView screen reader to use gestures to navigate the screen and hear spoken feedback about the items you select. Learn more about Echo with a screen accessibility and Alexa accessibility.

Warranty and Service

1-year limited warranty and service included. Optional 1-year, 2-year, and 3-year extended warranty available for Canada customers sold separately. Use of Echo Show 5 is subject to these terms.

Included in the Box

Echo Show 5, glacier white power adapter (15W)/cable (4.9 ft.) and quick start guide.

Generation

Echo Show 5 (2nd Gen) - 2021 release

Privacy Features

Wake word technology, streaming indicators, microphone/camera off button, built-in camera shutter, the ability to view and delete your voice recordings, and more. Visit the Alexa Privacy Hub to explore how Alexa and Echo devices are designed to protect your privacy.

Recommended device footprint

Echo Show 5 device is 5.8”W x 2.9”D. Recommended footprint: 6”W x 4”D.

Tuya Wireless Alarm System Review

Tuya Wireless Alarm Kit With Sensors, Siren, Keychain Remotes, Fobs And Control

Tuya Wireless Alarm Review

In this article we will be reviewing the Tuya Wireless Alarm system. This  system comes in many different package sizes so it should be easy to find one that meets your needs.  It does a good job of providing you with the all the components needed for a do-it-yourself alarm security.   

The included keypad/control connects to your local network and provides easy cloud based remote control and notifications through the Internet.  This is a good choice  for a low cost DIY project as there are no set-up or monthly fees. You can use the iOS or Android app to control and monitor your system from anywhere.  Push notifications can be sent to your smartphone whenever an alarm is activated.   

What you get

The Tuya wireless alarm package we chose included  enough devices to protect a small home or business. You can easily add more sensors to expand your system as needed.   

Alarm-Display-Keypad

Kit includes one keypad/control.  This is the brain of the system which communicates with all of the other devices in your home.  It connects to the Internet through your existing Internet WiFi router.  It  can send notifications to your phone and receives commands (arm/disarm).  

There is a built-in battery that provides standby power during a power failure.  

Keychain Remote

Package includes four(4) Keychain Remotes with 4 buttons.  Arm Away, Arm Home, Disarm and  Panic.  

Q? Encoding=Utf8&Amp;Asin=B09B38M1X3&Amp;Format= Sl160 &Amp;Id=Asinimage&Amp;Marketplace=Ca&Amp;Serviceversion=20070822&Amp;Ws=1&Amp;Tag=Senex01 20&Amp;Language=En CaIr?T=Senex01 20&Amp;Language=En Ca&Amp;L=Li2&Amp;O=15&Amp;A=B09B38M1X3

Kit includes one (1) Passive Infrared (PIR) Motion Detectors.  This detector can be placed on a table or mounted on a wall and will detect movement within its field of view. Again,  you can purchase additional detectors if/when needed. Requires two AAA batteries.

Q? Encoding=Utf8&Amp;Asin=B09B28Xfh4&Amp;Format= Sl160 &Amp;Id=Asinimage&Amp;Marketplace=Ca&Amp;Serviceversion=20070822&Amp;Ws=1&Amp;Tag=Senex01 20&Amp;Language=En CaIr?T=Senex01 20&Amp;Language=En Ca&Amp;L=Li2&Amp;O=15&Amp;A=B09B28Xfh4

Kit includes eight (8) Wireless Door/Window sensors. Requires one (1) AAA battery.

Key Fob

Two (2) RFID key fobs for easy arming/disarming of the system

Siren

One 6′ wired 100db siren.  

Usb Power Adapter

One power adapter with 3′ USB cable.

How does the Tuya WiFi System work?

The Tuya is a wireless alarm system so there is no need run cables throughout your home.  It will use your existing WiFi router to communicate to the iOS or Android Apps. Installing devices on your doors, windows and walls is easy. Just peel the double sided tape and mount the sensors on a door or wall.  

I found the sensors to be of fairly good quality.   However, I have found that any double sided tape will eventually dry out and the device could fall off.   I would recommend using a little bit of Silicone along with the double sided tape to provide a better mounting.

The Keypad/Control needs to be plugged onto a wall receptacle using the supplied adapter. So key this in mind when choosing a location for it.   

If you plan on mounting on a wall like a traditional alarm keypad keep in mind that both the siren and power cords need to plug into the side.  This may result in less than desirable appearance with cables running up your wall.  I found that using a adjustable stand (see below) and placing on a side table or counter is a great solution.  It hides the cables better.  Of course if you are of the handy type you could fish the wall or use wiremold to hide the cables.

The Keypad/Control connects to your existing Internet router using WiFi so there is no wire needed for this.  It just needs to be in range of your router which is normally not an issue a medium sized home.  The included siren was fairly loud at 100 decibels and does the job of warning would be intruders.

Keypad/Control sitting in an adjustable stand:

The Motion sensor was also easy to mount on a wall.  They come with a swivel bracket that allows you to angle the senor in any direction. You can mount the bracket using the supplied double sided tape or with screws.  I would always recommend screws if the installation is permanent.

Motion sensors are powered by two AAA batteries.  Depending on where they installed you could get up to a year of operation but this would be greatly reduced if in a busy area and are constantly being tripped.  In our test site the sensors located in a busy corridor lasted only 6 months.

Mounting the door/window sensor was also extremely easy.  Just peel and stick.  Again, a little silicone is recommended. Battery installation was a snap.  It uses a standard CR2032 battery.  The door sensors opened easily by pressing the side tabs and opening the motion with a small screwdriver. Another nice feature of these sensors is that they provide a LED that will flash red whenever the sensor detects the door/window is opened. 

The wireless alarm system comes with 2 RFID key fobs.  These worked flawlessly.  Just present the fob to the RFID location on the keypad/control instantly toggles the system status on/off.   

These Key Fobs makes arming/disarming your system quick and easy.  Its construction looks like it would withstand a lot of abuse.  It’s size is smaller than most which makes carrying around on your keychain  almost unnoticeable.

Four keychain remotes are also included in this package.  These allow you to arm/disarm and activate a panic alarm.  You can also arm your system in the Home mode.  

Mobile App - Smart Life

This wireless alarm system uses the Smart Life App which can be download from the Google Play store or  Apple store.  This App is used by many different products and I found it to be very reliable.  

The only issue I had was finding the Tuya WiFi wireless alarm system within the many many screens of products.  I eventually found it under Sensors then Alarm (WiFi).  Once I found this I was able to install and connect to the alarm with no issues.

The App has all the normal functions such as Arming Away, Arming Home,  Disarming and SOS (panic) on the main screen.  You can access the alarm History from here as well.  The top portion of the Home screen displays your current status. Overall a nicely laid out screen which was easy to use and understand.

The Smart Life home screen:
Tuya Alarm Life App Main Screen

Pro's & Cons

Pros

  • Great price. A very inexpensive way to get started with a wireless alarm security system
  • No monitoring fees or long term contracts
  • Expandable.  You can add up to 100 devices at any time.
  • Loud internal siren
  • Uses standard batteries which are easily obtainable
  • Works great a WiFi based system

Cons

  • This wireless alarm system does not monitor(supervise) its sensors which means if for any reason a sensor is unable to communicate to the keypad/control you will not be notified.  This could include dead batteries, RF interference or the sensor being physically removed from premise.  
  • Uses old 2G cellular technology which is difficult to find still functional in USA and Canada .  This leaves the  GSM communications feature as really not feasible. 

Conclusion

This system would be a good choice for those wanting a very inexpensive system and can live with frequent testing to ensure all sensors are still functioning (lack of supervision).  However, with no supervision there is no guarantee that a sensor will function when it needs to.

If the cheque book can afford it I would recommend a more professional grade system that has supervision.  If not, then this wireless alarm system would is one of the better low cost systems out there.

Related Article

Tuya Wireless Alarm Installation

Products Covered in this Article

Other products you may be interested in

Review of the HBN Smart Plug

Hbn Smart Plug Controlling Lamp On Night Table

In this review I will take a look at the HBN Smart plug available from Amazon. Smart Plugs are one the most useful smart home gadgets you can have.  I can say that from experience as I use them in my home. They are especially useful during the Christmas season to turn on my Christmas tree lights.  Saves me from crawling under the tree to plug it in every night.  

What you get

You get four (4) of the HBN Smart Plugs.    

Q? Encoding=Utf8&Amp;Asin=B07Wrfcxl9&Amp;Format= Sl250 &Amp;Id=Asinimage&Amp;Marketplace=Ca&Amp;Serviceversion=20070822&Amp;Ws=1&Amp;Tag=Senex01 20&Amp;Language=En CaIr?T=Senex01 20&Amp;Language=En Ca&Amp;L=Li3&Amp;O=15&Amp;A=B07Wrfcxl9

What you Need

The must haves:
  • 3 Prong Receptacles in your Home/Business
  • Wi-Fi network  (only supports 2.4Ghz.) 
The following are optional but they do provide additional features that make them a great addition
  • Alexa or Google Home Assistant (Optional)

How does the Smart Plug work?

These plugs allow you to turn lights, fans, and appliances on or off from anywhere in the world as long as you have an Internet connection and the Smart Life App installed on your phone.   You simply plug one of them into any existing 3 prong receptacle anywhere in your home/business then plugin the appliance you want to control.  Once connected you can manually control or even have them switch on/off based on the time of day.

There is a simple setup process that must be completed to have these plugs connect to your Wi-Fi.  When we did it only took a few minutes to download the App and have our smart plugs connected to our network.  The instructions were very clear and easy to use. 

If have a Google Home or Alexa assistant you can also control these by simply asking Alex/Google to turn on any or all of the smart plugs.  Hey Google. Switch on the Christmas lights”  or “Alexa. switch on the Christmas lights“.   

Another great feature is the ability to setup a Scene which allows you to control multiple smart plugs with a single command.  

So my overall experience with this smart plug was very positive and I believe they will be a great addition to my arsenal of smart gadgets. 

Features

FAQ

Do these have the ability to dim my lights?

No. They can be used to turn items On or Off only. No dimming functionality.

Can I control a heater with these?

It will depend on the rating of your heater.  These plugs can control up to 1875W Resistive/15A, 625W Tungsten/5A, 1/2 HP.  You need to make sure the heater conforms to these specifications before using.  If unsure then we recommend contacting an electrician for advise.  Heaters are resistive loads.

Do you need Alexa or Google to use these?

No.  You can download the Smart Life  app to control them and set schedules.  However, without these voice assistants you would not be able to issue voice commands. 

Is it compatible with Google Home and Alexa?

Yes.  It is compatible with Alexa, Google Assistant and IFTTT which allows to to connect and control other smart home devices.

What happens when there is a power outage?

On restore of power after a power outage the smart plug will reconnect to your Wi-Fi network and will retain any schedules and information set.  However, the smart plug will remain OFF for safety reasons.

Pro's & Cons

During my review I have identified the following Pros and Cons 

Pros

  • Works with both Google Home and Alex
  • Easy setup and connection to your home network
  • The bottom outlet in your receptacle remains accessible (smart plug must be plugin the top outlet).
  • Uses the Smart Life App which is widely used by other devices allowing you to use one app for many different devices.

Cons

  • Only one smart plug can fit in a single receptacle. 

Conclusion

If you are looking for an easy to install smart plug that is dependable then these units are a good choice for the money.   

Products Included in this Article

Other items you may be interested in

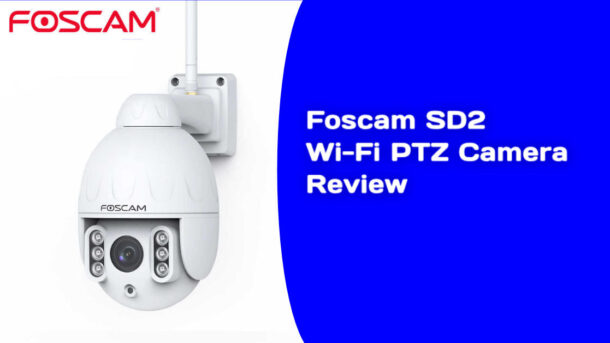
Foscam SD2 Wi-Fi PTZ IP Camera Review

Sd2-Camera-Review

Foscam SD2 WI-FI PTZ CAMERA REVIEW

In this review we will look at the Foscam SD2 1080p Wi-Fi PTZ camera.  

What you get

You get everything you need to get your camera setup. 

  • PTX Wi-fi Camera
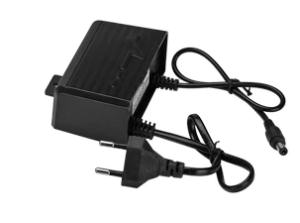
  • 12VDC power adapter
  • Ethernet Network Cable
  • Wi-Fi Antenna
  • Mounting Bracket
  • Mounting template
  • Small Philips screwdriver
  • Waring decal
  • Connector Protector
  • User’s Manual

The camera shell is made of metal not plastic and the cable leads were longer that normal which makes it much easier to pass through walls.  The power adapter is listed for use in Canada and the USA. 


Foscam What You Get

How does the Camera work?

To perform this review I first setup the camera on the bench.  There’s really not much to the installation.  Just plug the power adapter into a wall outlet and the 2.5 mm plug into the power lead on the camera.  There are two leads coming from the camera. Power and Ethernet network connection.  Once plugged in the camera began its startup sequence which includes panning and tilting and then finally coming to rest.  This all took about 10 seconds.

Next I installed the Foscam App from the App store (Android).  Created an account and was ready to add my first device/camera.  The App installation was a simple process with no surprizes.  However, they do try to sell you on their paid cloud service.  

To connect the camera I decided to use the camera’s hardwired Ethernet connection.  I Plugged in the provided network cable into the camera then my router.   I was very surprised to see network status LED’s on the cameras connector which is a nice feature.  The camera also announced, in English,  that it connected to a wired connection.  This certainly takes the guess work out determining if you are connected or not.

Next I followed the provided instructions and selected the Add Device icon (+) on the APP and then scanned the QR label situated on the cameras bracket.  The App picked up the code before I could even get the phone camera lined up with the label.  The next thing I knew the camera was connected using the Ethernet hardwired connection.

At this point the App recommended that I connect the camera using Wi-Fi. Since I always do what I’m told,  I selected the Configure Wi-Fi button.  I picked my Wi-Fi network from the list and provided the password and  selected Connect.  As expected I received confirmation that the camera was added successfully in about 10 seconds. I then completed the setup by naming the camera and configuring a camera username/password.  Once all the above was done I finally got live video from the camera. 

Now that the camera is setup and I’m getting video I proceeded to test its many features/functions.  Here is what I found.

Video Quality

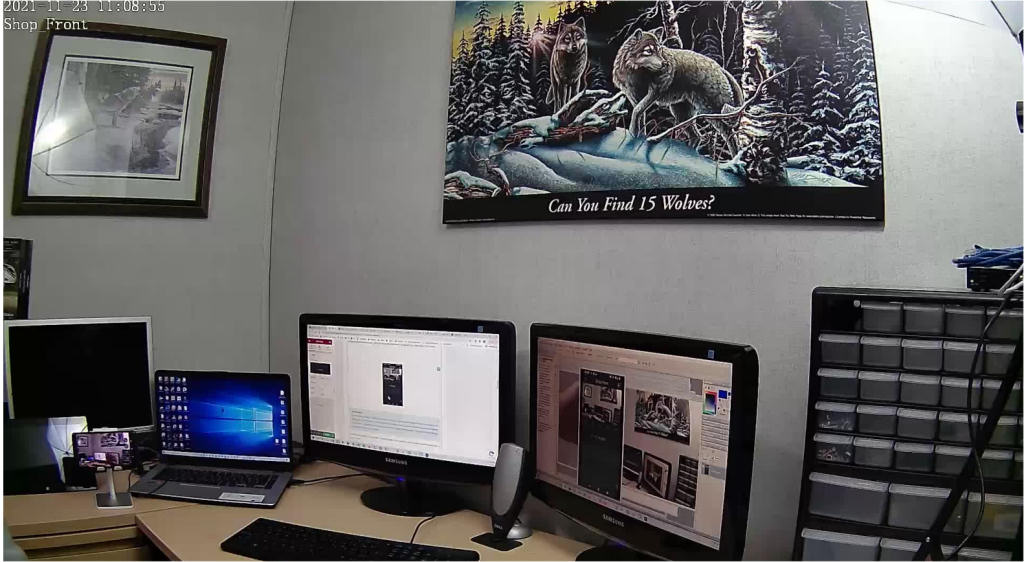
 As you can see from the screen shots the video quality was very good. The Landscape orientation provided an exceptional image which I was happy with.  The camera was set to provide Standard Definition (SD) in the first screenshot and Full High Definition (HD) in the second.  

SD Landscape

Sample Image Of Sd2 Camera View

HD Landscape

Sample Image Of Sd2 Camera Landscape View Of Desk

The only recommendation I would have regarding the video quality would be that the WDR functionality could use some improvements.  I found that if you had a very high contrasted scene (camera looking at a window) the camera would have difficulties handling it and you would end up with some of the image too dark to make anything out.

Pan/Tilt control

The the pan and tilt control of the camera was excellent and it did not exhibit any lagging.  When you release your touch it immediately stopped which made it easy to get the desired image.  I especially liked the way they handled the touch control. Once you touch and swiped you can keep the pan or tilt active for as long as you maintain touch.  It made for a smoother user interface and better control.  The pan/tilt was very smooth with almost no motor noise. 

Sound Detection

The sound detection worked well.  You can set the detection level to one of 5 levels (Lowest, Lower, Low, Medium, High).  It would send notifications to my phone when ever it heard adequate sound in its area.  It also save a short video of what it saw during the sound alarm in the SD Card area.  It was nice to see a list of alarms to choose from and view just by clicking on one. In a way,  I kind of like this method of play back over the standard sliding timeline.  

Motion Detection

Motion detection worked great. Here too you can set the sensitivity to one of 5 levels (Lowest, Lower, Low, Medium, High).    This wide range in sensitivity would come in very useful when dealing with false motion detection due to bugs, leaves, trees and other similar items.  I had to lower the setting to the Lowest setting to get my camera to stop sending false detection alarms. 

AI Human Detection 

You have the option of using standard Motion Detection (above) or AI Human Detection but you cant have both enabled at the same time.  The Human Detection we are testing here is done on the device as apposed to their more advanced online cloud services.  It is supposed to distinguish between human and non-human objects.  To test the AI Human detection I first setup the camera with standard Motion Detection and pointed the camera at a scene that had some plants that where moving due to a light breeze.  The motion alarm was constantly being activated as it picked up the plant moving (I had this set to highest sensitivity).   I then set the camera to AI Human detection with the same scene and monitored.  It was disappointing to see that it continued to generate motion alarms even without anyone entering the field of view.   I expected all detection alarms to stop as there wasn’t anything remotely resembling a human in the scene.  I found this strange so  I contacted their support team just to ensure that I hadn’t setup something wrong that caused this but I never received a reply. 

We also tested the AI Human Detection in a real life environment.  It was installed on a home looking at a large driveway.  When we walked into the view it seemed to work better and it identified us as human and sent a proper notification.  This would be a great feature to prevent false detections as would normally be endured with standard motion detection (bugs, leaves, trees etc.).

Cloud Storage

I normally do not test the online cloud services when I do reviews but in this case I thought I would subscribe and check out their AI Recognition Reminder.  Not sure why they called it a Reminder but in any case according to the documentation its supposed to identify the differences in packages, human bodies, pets and vehicles.  So I went ahead and signed up for the Free 30 day trial subscription.  The sign up was super easy which I did right from the App by selecting the MyPlan icon from the settings screen. 

The cloud video storage worked flawlessly.  If an alarm was tripped it stored the video in the cloud and I was able to easily view the events.  The playback interface was very responsive and didn’t exhibit any lagging or stuttering.  The provided sliding time line displayed all my alarm events and I was able to zero in on the exact video I was looking for.

I then proceeded to test the the Cloud AI Recognition features (Packages, Human, Pets and Vehicle) starting with Human Detection.  Please note that the AI detection features being tested here are those performed on the cloud service not locally on your camera.  How this works is that the camera sends the video to the cloud service which will then analyse the video to determine if its a package, vehicle, pet or human.  If detection is successful it will push a notification with the detected type to your phone.   

Note:  In the App they provided a list of cameras and countries that supported the Cloud AI Recognition features.  The SD2 camera was not listed and neither was Canada.  I sent a request to Foscam support to confirm if its officially supported and have not yet received a response.  I will update this review if/when I do get a response. However, despite not be listed as supported it still worked.  

I setup the camera with a full view of me walking towards the camera.  I walked at a normal pace towards the camera and I got varying results.  Sometimes it detected me and pushed a notification and other times it didn’t detect me at all.  In most cases it would detect me but would push a generic notification “Motion detection alarm”.  The distance from me and the camera was about 12′ or 365 cm.

Next I tried the Package detection feature.  I setup the camera to view a counter on which I would place a box (approx. 12″ x 12″) and walked away.  Again, it was not able to detect the package all the time and most of the time I got a notification saying “Motion detection alarm” without it specify that it was a package.

Next up was the vehicle detection.  I pointed the camera at a empty spot in a driveway.  We then had a vehicle park in the cameras FOV.   It did pick up the vehicle and sent a proper notification.

So I would have to say that the AI detection is probably about 90% reliable but I would also believe that different environments could provide different results.

Would I subscribe to this cloud service even without these features?  Well I would if I needed to store longer periods of video that couldn’t be handled by the on board SD Card.    

Play Back from SD Card

The camera has the ability to record video on a SD card that you insert into the back of the camera.  I had a 32GB SD card lying around so I installed it into the camera (SD cards are not included with camera).  I then proceeded to cause some motion and sound alarms.  With each alarm I received a notification on my phone and a new recording stored within the SD Card section of the App.  The way they organize the alarm recordings is by using a simple list with the type of alarm recording (Sound, Motion or Human Detection) along with the time of the alarm and a video clip.  This made it easy to find the event I was looking for.  When you open an alarm event it provided a playback view where can easily view the alarm video. You also have the ability to jump forward or backwards within the video clip. The video playback was excellent.   You can even download the videos for long term storage.   I was very happy with the SD card storage feature.

Sharing 

If you want to share your cameras you can do that too.  You just need to go to the Share Camera menu option and add the account you want to share with.  The person will need to have an account setup prior to using this feature.  The App wont send an invite to them which I think could be a great feature for the manufacturer to add.

IR Night Vision

As with any camera I find the IR illumination range mentioned in the specifications rarely line up with reality.  In my test I estimate the IR illumination for the SD2 would reach approx. 10m in my environment.  

Pan/Tilt control

The the pan and tilt control of the camera was excellent and it did not exhibit any lagging.  When you release your touch it immediately stopped which made it easy to get the desired image.  I especially liked the way they handled the touch control. Once you touch and swiped you can keep the pan or tilt active for as long as you maintain touch.  It made for a smoother user interface and better control.  The pan/tilt was very smooth with almost no motor noise. 

Sound Detection

The sound detection worked well.  You can set the detection level to one of 5 levels (Lowest, Lower, Low, Medium, High).  It would send notifications to my phone when ever it heard adequate sound in its area.  It also save a short video of what it saw during the sound alarm in the SD Card area.  It was nice to see a list of alarms to choose from and view just by clicking on one. In a way,  I kind of like this method of play back over the standard sliding timeline.  

Motion Detection

Motion detection worked great. Here too you can set the sensitivity to one of 5 levels (Lowest, Lower, Low, Medium, High).    This wide range in sensitivity would come in very useful when dealing with false motion detection due to bugs, leaves, trees and other similar items.  I had to lower the setting to the Lowest setting to get my camera to stop sending false detection alarms. 

AI Human Detection 

You have the option of using standard Motion Detection (above) or AI Human Detection but you cant have both enabled at the same time.  The Human Detection we are testing here is done on the device as apposed to their more advanced online cloud services.  It is supposed to distinguish between human and non-human objects.  To test the AI Human detection I first setup the camera with standard Motion Detection and pointed the camera at a scene that had some plants that where moving due to a light breeze.  The motion alarm was constantly being activated as it picked up the plant moving (I had this set to highest sensitivity).   I then set the camera to AI Human detection with the same scene and monitored.  It was disappointing to see that it continued to generate motion alarms even without anyone entering the field of view.   I expected all detection alarms to stop as there wasn’t anything remotely resembling a human in the scene.  I found this strange so  I contacted their support team just to ensure that I hadn’t setup something wrong that caused this but I never received a reply. 

We also tested the AI Human Detection in a real life environment.  It was installed on a home looking at a large driveway.  When we walked into the view it seemed to work better and it identified us as human and sent a proper notification.  This would be a great feature to prevent false detections as would normally be endured with standard motion detection (bugs, leaves, trees etc.).

As our camera was not listed as being supported we did not test the Cloud AI Detection but You can watch a video about their cloud AI Human Detection here.

Cloud Storage

I normally do not test the online cloud services when I do reviews but in this case I thought I would subscribe and check out their AI Recognition Reminder.  Not sure why they called it a Reminder but in any case according to the documentation its supposed to identify the differences in packages, human bodies, pets and vehicles.  So I went ahead and signed up for the Free 30 day trial subscription.  The sign up was super easy which I did right from the App by selecting the MyPlan icon from the settings screen. 

The cloud video storage worked flawlessly.  If an alarm was tripped it stored the video in the cloud and I was able to easily view the events.  The playback interface was very responsive and didn’t exhibit any lagging or stuttering.  The provided sliding time line displayed all my alarm events and I was able to zero in on the exact video I was looking for.

I then proceeded to test the the AI Recognition features starting with Human Detection. Please note that the AI detection features being tested here are those performed on the cloud service not locally on your camera.  How this works is that the camera sends the video to the cloud service which will then analyse the video to determine if its a package, vehicle, pet or human.  If it is successful it will push a notification with the detected type to your phone.   You can watch a video about their 

I setup the camera with a full view of me walking towards the camera.  I walked at a normal pace towards the camera and I got varying results.  Sometimes it detected me and pushed a notification and other times it didn’t detect me at all.  In most cases it would detect me but would push a generic notification “Motion detection alarm”.

Next I tried the Package detection feature.  I setup the camera to view a counter on which I would place a box (approx. 12″ x 12″) and walked away.  Again, it was not able to detect the package all the time and most of the time I got a notification saying “Motion detection alarm” without it specify that it was a package.

Next up was the vehicle detection.  I pointed the camera at a empty spot in a driveway.  We then had a vehicle drive into view and park in the cameras FOV.  

Last but not least I tested the Animal detection.  The start of our test was Racer.  

So I would have to say that the AI detection is probably just not there yet and that you cannot rely on it to notify you 100% of the time.

Would I subscribe to this cloud service even without these features?  Well I would if I needed to store longer periods of video that couldn’t be handled by the on board SD Card.    

Play Back from SD Card

The camera has the ability to record video on a SD card that you insert into the back of the camera.  I had a 32GB SD card lying around so I installed it into the camera.  I then proceeded to cause some motion and sound alarms.  With each alarm I received a notification on my phone and a new recording stored within the SD Card section of the App.  The way they organize the alarm recordings is by using a simple list with the type of alarm recording (Sound, Motion or Human Detection) along with the time of the alarm.  This made it easy to find the event I was looking for.  When you open an alarm event it provided a playback view where can easily view the alarm video. You also have the ability to jump forward or backwards. The video playback was excellent.   You can even download the videos for long term storage. 

Sharing 

If you want to share your cameras you can do that too.  You just need to go to the Share Camera menu option and add the account you want to share with.  The person will need to have an account setup prior to using this feature.  The App wont send an invite to them which I think could be a great feature for the manufacturer to add.

IR Night Vision

As with any camera I find the IR illumination range mentioned in the specifications rarely line up with reality.  In my test I estimate the IR illumination for the SD2 would reach approx. 10m in my environment.  

Features

Compact size PTZ
350 degree pan / 90 degree tilt
2.8~12mm lens (4X optical zoom)
6X digital zoom
Colour day vision
Night vision with IR illumination up to 50M
IR cut filter, 6 LEDs
Ethernet connection
Wi-Fi 2.4 & 5 GHZ 802.11 b/g/n/ac
Free iOS and Android apps
Cloud recording available
CD card slot for local recording
Powered by included 12VDC 2A plug-in power supply
Wide Dynamic Rage (WDR)
IP66 outdoor rated
Rated to -20C.

FAQ

Does this camera support ONVIF?

Yes.  This camera does support the ONVIF standard.

Can I view video from the camera when on vacation?

Yes . As long as you have a suitable Internet connection you can view video and control this camera from any where.  

Can I record video?

Yes.  You can record video using the onboard SD card or you can subscribe to their online cloud (paid service) service.  Both methods will let you search and playback video.

Is it compatible with Google and Alexa?

Yes.  It is compatible with both Alexa and Google.

Can I install and view multiple cameras?

Yes.  You are limited only by your home network bandwidth.  

Pro's & Cons

During my review I have identified the following Pros and Cons 

Pros

  • Good price for a camera of this quality level
  • No cloud service required as you can store and retrieve video on/from the SD card
  • Onboard storage of video using a SD card
  • Night vision
  • Supports Wi-Fi and wired Ethernet connection

Cons

  • No auto tracking.  
  • Cloud AI Detection needs some improvement
  • Camera Human Detection needs improvement
  • Usable night vision was only 10m 
  • Very difficult to connect the camera to WiFi.  Would take multilpe resets before connecting.

Conclusion

As you can see from our testing there are a number of areas where this camera could be improved but it did perform adequately in most environments.   Based on its low price price point and the available features this may be a camera worth considering.  However,  their lack of response to my support requests would raise some concerns.  Based on the performance and the lack of customer support I would recoemend looking at other models or brands in this price range. 

Specifications

Manufacturer Foscam
Place of Business USA
Batteries Not required
Item model number SD2
Dimensions 180mm x 111mm x 180mm
7.1" x 4.37" x 7.1"
Colour White
Lens 2.8~12mm lens (4X optical zoom)
Display Resolution 2.0 megapixels (1920x1080)
Image Compression H.264
Storage Micro SD card (max 128GB), local, FTP, NVR & Cloud storage
Wireless Standard IEEE802.11b/g/n/ac
Wireless Security WPA,WPA2
Network Protocols IP, TCP, UDP, HTTP, HTTPS, SMTP, FTP, DHCP, RTSP, ONVIF
App Foscam App
Power Source 120VAC Adapter - 12VDC 2A Output
Mounting Type Surface Mount
Usage Indoor/Outdoor use
Temperature -20c ~ 50c
-4°F~122°F
Included Components PTZ Camera x 1, Power Supply X 1, Mounting Accessories
Warranty Description 1 Year Manufacturer

Products Covered in this Article

Other products you may be interested in

Anbiux Wi-Fi Camera P17B Review

P17B Wi-Fi Ptz Camera

ANBIUX WI-FI CAMERA REVIEW

Cameras-Red-Blue-Lights

In this review we will look at the ANBIUX Wi-Fi camera model P17P 1080p PTZ.  This camera is a product of China and can be purchased on websites such as AliExpress.  You will also find many similar cameras on Amazon possibly under a different brand name.  They are known for their extremely low cost but many consider these cameras to be of low quality.  I always don’t believe what I hear so I thought I would check it out myself to see how this particular product would perform.   So I ordered one from AliExpress and performed a detailed impartial review on it.

What you get

You can order multiple versions of this camera so for this review I ordered the single camera with the 32GB SD memory card.  This particular model has the red and blue warning LED’s and will speak in English with different messages.  The shipment came very well packaged and took about 3 weeks to arrive.  That’s actually pretty good as it typically takes 4-6 weeks depending what shipping method was chosen. Here’s what I received:

P17B Camera

One (1) 1080p Wi-Fi IP PTZ camera

Power Adpater

One (1) 12vdc power supply

Memory Card

One (1) 32G SD memory card

Foam-Gasket

Wall bracket foam gasket 

Screws-Anchors

Screws and wall anchors

Small-Philips-Screwdriver

One (1) 32G SD memory card

User-Manual

User’s Manual

How does the Camera work?

To perform this review I setup the camera on the bench.  There’s really not much to the installation.  Just plug the power adapter into a wall outlet and the 2.5 mm plug into the power lead on the camera.  There are three leads coming from the camera. Power, Ethernet network connection and a reset button.  Once plugged in the camera will begin a startup sequence which includes panning, tilting and flashing the Red & Blue LED’s.  It will eventually stop and sit idle after about 30 seconds.

Q? Encoding=Utf8&Amp;Asin=B07Wqpkw7B&Amp;Format= Sl250 &Amp;Id=Asinimage&Amp;Marketplace=Ca&Amp;Serviceversion=20070822&Amp;Ws=1&Amp;Tag=Senex01 20&Amp;Language=En CaIr?T=Senex01 20&Amp;Language=En Ca&Amp;L=Li3&Amp;O=15&Amp;A=B07Wqpkw7B

I first used the camera’s Wi-Fi connection to setup the camera as this would likely be what most would use.  I started the learning process by installing the App YCC365Plus from the Google Play store.  The App install was super easy and uneventful.  Once installed I followed the instructions and started the learning process for a Intelligent camera. At this point it gave me 3 options for connecting the camera:  1) Scan code;  2) AP Hot Spot;  or 3) Direct connect using a cable.  I started with the AP Hot spot. 

After selecting the AP Host Spot and following the instructions to reset/boot the camera I had no problems finding the camera’s AP Hot Spot (CLOUDCAM_xxxx) in my list of Wi-Fi networks on my phone and connected with no issues.  At this point the process failed.  The App just sat idle with nothing happening. I waited at least 5 minutes but no luck.  The App would not connect and give me the option to input my Wi-Fi credentials.  I tried this complete AP procedure multiple times with the same results. I eventually gave up with AP Hot Spot and moved onto using the scan code option to learn my camera. 

I followed their instructions for use a scan code and after presenting the QR code to the camera it was immediately learned and showed up in my App.  I now had live video.

The video looked great on both SD and HD modes.  I was very happy with the quality of the image.

I then proceeded to test the many functions:

Panning/Tilting control

The the panning and tilting control of the camera was quite good and didn’t exhibit any extreme lagging.  The only possible issue I saw was that the camera would continue to try panning or tilting even though it reached its limits.  My concern with this would be the possible wear and tear on the inner gears. 

Intelligent Tracking

One of the best selling features of this camera is its ability to perform Auto Tracking.  In my tests it worked quite well in picking me up in it’s field of view.  It would follow me just fine as long as I didn’t move too fast.  If I was fairly close to the camera and walked at a faster than walking pace it would tend to lose track of me.  At a normal pace it worked fine.  Now it would only track me on the horizontal plane so if you expect vertical tracking you would be out of luck.  

Sound Detection

The sound detection worked as advertised.  It would send notifications to my phone when ever it heard adequate sound in its area.  It pick up me talking at normal volume about 8 feet away.  

Motion Detection

Motion detection worked quite well. Actually too well in some cases.  It would detect cars headlights from cars about 100 feet away, reflections of those same headlights off other objects, rain, bugs and blowing leaves.  Basically unusable in any area where any of the above could be seen.  Indoors it seemed to work fine. This was using the Low motion setting. 

Cloud Storage

I did not test the cloud storage as it required a paid subscription.  At the time of this review they were offering 7 days all day storage for approx. $69 USD per year.  I found the onboard SD card storage worked fine for me but of course you will be limited on much you can store on a SD card.  When using a SD card the older recordings will be overwritten with new video if the SD card becomes full.  The number of days you will be able to store will depend on if you setup to record on motion only or record all the time.  

Play Back from SD Card

As mentioned you can have video recorded on a SD card.  It supports up to 128GB.  In my test we used a 32GB card.  I first setup recording to Continuous recording mode.  I then viewed the recorded video with the built in viewer and it seem to work just fine.  I was able to move back and forth between different times and it adjusted fairly quickly.  I recorded for one hour and checked the percentage of storage used.  It was .21% which roughly translates to 1.6GB/ day which provide approx. 20 days of storage on the SD card.  This was recorded with almost no movement in the camera’s field of view (FOV).  Having continuous movement in the FOV would drastically increase the amount of storage used for the same time period.  So the amount of storage you will get will depend on your environment.

Sharing 

To give other people access to watch video from your camera you need to share your camera with them.  There is a Sharing menu option on the App where you can enter their email or phone number.  It will then send them a email with instructions on how to setup an account and access and control live video on your camera.  They will not be able to view recorded video unless you subscribe to the paid cloud service.

Major Issue Found

Hold on a minute! During my review testing the camera started to exbibit some strange behaviour.  After more investigation I found that once you connect this camera to the App it would constantly perform a reset approx. every 30 minutes.  During this reset it would start panning left and tilting up, and turn on the Red and Blue LED’s.  This would take about 10 seconds.  It would then return to the original position and resume normal operation.  During this time all communications would stop with the App.  I contacted the supplier/manufacturer in China and provided them with all the details.   I completed this review hoping that they would resolve the issue (possibly issue new firmware) but at the time of this review release the  issue was not resolved or acknowledged.  So at this time I can not recommend that you purchase this  camera.

Features

FAQ

Does this camera support ONVIF?

No.  This camera does not support the ONVIF standard.

Can I view video from the camera when on vacation?

Yes . As long as you have a suitable Internet connection you can view video and control this camera from any where.  

Can I record video?

Yes.  You can record video using the onboard SD card or you can subscribe to their online cloud (paid service) service.  Both methods will let you search and playback video.

Is it compatible with Google Home and Alexa?

No.  It is Not compatible with Alexa, Google Assistant or IFTTT.

Can I install and view multiple cameras?

Yes.  You are limited only by your home network bandwidth.  

Pro's & Cons

During my review I have identified the following Pros and Cons 

Pros

  • Great price. A very inexpensive way to get an IP Camera with PTZ
  • No cloud service required as you can store and retrieve video on/from the SD card
  • Built-in Auto Tracking
  • Red and Blue alarm LED’s
  • Onboard storage of video using a SD card
  • Night vison
  • Supports Wi-Fi and wired Ethernet connection

Cons

  • Major issue with it resetting every 30 minutes  
  • Power adapter not approved for use in Canada or USA  
  • Could not get the AP Hot Spot to work

Conclusion

I guess the old adage “You get what you pay for” comes into play here.  With the issue of resetting every 30 minutes set aside for now, this camera worked as advertised for the most part.  The video it produced was good and the playback worked flawlessly.  While most of the other features worked  there were concerns with the motion alarm sensitivity and of course the power adapter approval.  If you are looking something very basic, extremely inexpensive and have environment suitable for this camera then this may be a camera for you.  However,  I would prefer to pay a little more and get a more professional grade camera. 

In any case this is all mute at this time as the camera has an issue that basically makes it unusable in any environment until they get the Reset issue resolved.  If the supplier/manufacturer resolves the issue I will update this review. 

Specifications

Manufacturer ANBIUX
Place of Business China
Batteries Not required
Item model number P17B
Colour White
Lens 3.6mm
Resolution 1920x1080P
App YCC365Plus
Power Source 120VAC Adapter - 12VDC Output (No UL or CSA listings)
Mounting Type Surface Mount
Usage Indoor/Outdoor use
Included Components PTZ Camera x 1, Power Supply X 1, Mounting Accessories
Warranty Description 75 Day Buyer Protection

Products Included in this Article

Other products you may be interested in

Skyline SK-200 Wireless Alarm System Review

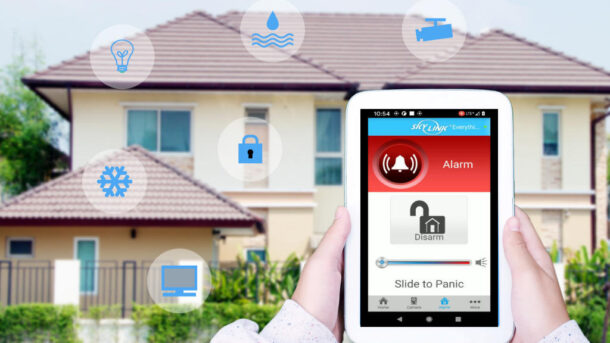
Skylinknet-Sk-200-App-Controlling-House

Skylink SK-200 Alarm System Review

Looking for a wireless alarm system that you can install yourself?  With a huge selection of DIY systems out there it can be difficult to choose the right system for your situation.   This review will help you decide on if the SK-200 is a system worth considering.     

What you get

The SK-200 is a starter kit is just that. A starter kit.  You don’t get all the bells and whistles with this kit but you do get the components for a basic system.   

Q? Encoding=Utf8&Amp;Asin=B010Tlzomi&Amp;Format= Sl160 &Amp;Id=Asinimage&Amp;Marketplace=Ca&Amp;Serviceversion=20070822&Amp;Ws=1&Amp;Tag=Senex01 20&Amp;Language=En CaIr?T=Senex01 20&Amp;Language=En Ca&Amp;L=Li2&Amp;O=15&Amp;A=B010Tlzomi

Kit includes one (1) Hub.  The Hub communicates with the other devices in your home.  It connects to the Internet through your existing Internet router to sends notifications to your phone.  It also receives commands  like arm/disarm.  Requires 4 AAA batteries.  (Batteries not included).  

Q? Encoding=Utf8&Amp;Asin=B00Si3Zqxm&Amp;Format= Sl160 &Amp;Id=Asinimage&Amp;Marketplace=Ca&Amp;Serviceversion=20070822&Amp;Ws=1&Amp;Tag=Senex01 20&Amp;Language=En CaIr?T=Senex01 20&Amp;Language=En Ca&Amp;L=Li2&Amp;O=15&Amp;A=B00Si3Zqxm

Kit includes one (1) Passive Infrared Receiver (PIR) Motion Detector.  This detector can be placed anywhere in your home to detect movement.  Place on a table or mount on a wall. You can purchase additional detectors if/when needed. Requires one AA battery (Batteries not included).

Q? Encoding=Utf8&Amp;Asin=B00Si44Nvc&Amp;Format= Sl250 &Amp;Id=Asinimage&Amp;Marketplace=Ca&Amp;Serviceversion=20070822&Amp;Ws=1&Amp;Tag=Senex01 20&Amp;Language=En CaIr?T=Senex01 20&Amp;Language=En Ca&Amp;L=Li3&Amp;O=15&Amp;A=B00Si44Nvc

Kit includes one (1) 4 button Keychain Remote.  Arm Away, Arm Home, Disarm and Panic.  You can purchase additional Remotes as needed.  

Q? Encoding=Utf8&Amp;Asin=B00Sl5Bb3G&Amp;Format= Sl160 &Amp;Id=Asinimage&Amp;Marketplace=Ca&Amp;Serviceversion=20070822&Amp;Ws=1&Amp;Tag=Senex01 20&Amp;Language=En CaIr?T=Senex01 20&Amp;Language=En Ca&Amp;L=Li2&Amp;O=15&Amp;A=B00Sl5Bb3G

Kit includes two (2) WD-MT Wireless Door/Window sensors. Requires one (1) AAA battery  (Batteries not included).

Power Adapter

One (1) Power Adapter (output 6vdc .5 amp) for the Hub. Comes with 6′ cable

Network-Cable-6-Foot

One 6′ Ethernet Network Cable for connecting the Hub to your existing router.

Skylink Decal

Two (2) Skylink decals.

Mounting-Accessories

Multiple screws, wall anchors, 3M double sided tape and spacers.

How does the SkylinkNet System work?

The Skylink system is a Wireless system so there is no need run cables throughout your home.  You simply peel the double sided tape and mount the sensors on a door or wall.  I found the sensors to be of good quality.  Mounting on doors or windows was not a problem at all.  The double sided tape seems to be of good quality so I would expect they should stay stuck for a long time.

The Hub needs to be plugin to your Internet router using the supplied network 6′ cable.  In my opinion, this does not give you a lot of leeway and may be a bit of an issue depending on where your router is located.  For me, I would want the Hub to be easily accessible when entering and exiting my home.  If your router is stuck away in some obscure corner then this may not be feasible.  However, with a Remote Key FOB available to arm/disarm we wouldn’t need to access the Hub frequently so we could get around this limitation.   Of course, there is also the option of purchasing a longer network cable to move the Hub to a more usable location.  If your Wi-Fi router is in a good location then this wouldn’t be a concern at all.  The built-in siren was extremely loud at 110 decibels.

The Motion sensor was also easy to mount on a wall.  They come with two spacers that for the life of me I can’t figure out how they would be useful.  Not sure why you would want to space out your sensor a 1/4 “.  I even contacted the manufacturer to confirm the use of these spacers and they confirmed they were indeed for the motion detector.  In any case,  I didn’t need them but if anyone finds a use for these please let us all know.  The only other comment I have for the motion would be that they didn’t have any holes on the angled sides to be able to mount in a corner.  If I wanted to use screws to mount (which I always tend to do) I would need to pre-drill some holes. Not the end of the world and it probably just old guys like me that still like to mount using screws.

Battery installation was a snap.  The door sensors opened easily by pressing the side tabs and opening the motion with a coin worked great. The Hub has a cover that presented no issues even for my big fingers.  I also like the fact that the system uses standard batteries instead of specialized batteries which can get expensive.

The Remote Key Fob is a great feature and makes arming/disarming your system quick and easy.  Its construction looks like it would withstand a lot of abuse.  It’s size is smaller than most which makes carrying around on your key chain  almost unnoticeable.

I installed the app on my Android phone with no issues at all.  The instructions where extremely easy and intuitive.  I like the way they laid out the buttons on the bottom so you access the different areas of the app (Home, Camera, Alarm, More) . The screen layouts were also of good design.  I especially like the use of large icons for each sensor that change status in real time.  The App was very responsive.  

Lastly,  they provided decals to warn would-be intruders that there is an alarm system installed which a great added feature and are worth their weight in gold.

Features

Integrates with the SkylinkNet Security Cameras

Seamlessly Integrates with the WC-400PH and WC-520 wireless IP cameras.  

Built-in Chime Feature

Easily enable a chime  for each of your sensors.  Whenever a sensor trips the Hub will emit a soft chime.  

Control your System from Anywhere

Arm/Disarm or receive alarm notifications on your phone from anywhere you have a Internet connection.  

FAQ

Do you need to purchase a monitoring agreement/service?

No.  This system is really intended for the do-it-yourselfer so it does not have the capability to be professionally monitored.  You do your own monitoring using the free iOS or Android App.  No contract or monthly fees.

Do I need a Internet Connection?

Yes . To be able to use the smart App the Hub needs to be connected to your router using a hardwired connection for Internet connectivity.  

Can I add sensors to this kit?

Yes.  You can add up to 100 devices so you can add Motions, Doors , remotes , smoke detectors and more.

Is it compatible with Google Home and Alexa?

Yes.  It is compatible with Alexa, Google Assistant and IFTTT which allows you to connect and control other smart home devices.

Can I use this with other manufacturers sensors?

No.  This system is compatible with SkylinkNet sensors only.

Pro's & Cons

During my review I have identified the following Pros and Cons 

Pros

  • Great price. A very inexpensive way to get started with a security system
  • No monitoring fees or long term contracts
  • Expandable.  You can add up to 100 devices at any time.
  • Compatible with other smart home devices
  • Integrates with surveillance cameras
  • Has Low Battery monitoring for the sensors
  • Loud internal siren

Cons

  • Hub does not connect using Wi-Fi. The Hub needs to be within 6′ of your router to facilitate a hardwired connection.  This may be an issue in some cases which may require the purchase of a longer network cable.  
  • Requires a minimum of 8 digits for the arming/disarming code when using the keypad on the Hub.  I have trouble remembering 4.  

Conclusion

If you are looking for an easy to install wireless system that wont break the bank then the SkylinkNet SK-200 kit is probably a good bet.  

Specifications

Manufacturer Skylink
Product Dimensions 38.74 x 10.16 x 12.7 cm; 589.67 Grams
Batteries AA and AAA (not included)
Item model number SK-200
Colour White
Power Source 120VAC Adapter - 6VDC Output
Mounting Type Surface Mount
Usage Indoor use only
Included Components Internet Hub HU-100 X 1, Door/Window Sensor WD-MT X 2, Motion sensor PS-MT X 1, Keychain Remote MK-MT X 1, Power Adapter X 1, Ethernet Cable X 1, Mounting Accessories
Warranty Description 1 Year
Item Weight 590 g

Products Included in this Article

Other products you may be interested in

Review of The Kono Smart Wi-Fi Thermostat KN-S-AMZ-004

Thermostst Kono Kn-S-Mg1
Q? Encoding=Utf8&Amp;Asin=B07Ct3Gnz8&Amp;Format= Sl250 &Amp;Id=Asinimage&Amp;Marketplace=Ca&Amp;Serviceversion=20070822&Amp;Ws=1&Amp;Tag=Senex01 20&Amp;Language=En CaIr?T=Senex01 20&Amp;Language=En Ca&Amp;L=Li3&Amp;O=15&Amp;A=B07Ct3Gnz8

Lux aren’t new to thermostats – over 16 million homes in the United States and Canada are using one of their devices and they’re well known for making high-quality products. If you’re in the market for a smart thermostat, anything made by Lux is probably a good option, and none more so than the Kono.

 The Lux Kono smart thermostat is modern, sleek, and just a little bit sexy. It connects to most other smart home devices with ease and even works with your phone, regardless of how far away from home you are. It can be personalized with snap-on covers and comes with a very reasonable price tag.

If you want something smart and good-looking, this thermostat could definitely be the one for you.

Smart Features

Kono is a thermostat that has so many features it can do pretty much anything when it comes to controlling the temperature in your home.

Its main feature is how effortlessly it connects to all the major smart home devices. This includes Amazon Alexa, Google Assistant, and Apple Homekit. We’ll look at compatibility a bit later in the post, but if you have multiple other smart home devices of different makes, the Kono certainly won’t limit you on what it can work with – it likes to be friends with everyone.

Another really useful function is its ability to connect with your phone via the Lux mobile app. Even if you’re on the other side of the world if your phone has internet access you can control the temperature at your home. You can set heating and cooling schedules, view runtimes and control the target temperature. It’s a great feature for making sure your home is nice and warm for when you get home from work!

You can even add more than one thermostat to the device, so if you have multiple properties or want different temperatures in different rooms, you can easily control them all at the touch of a button.

Radius geofence also comes to the rescue if you forget to turn off your air conditioning when you leave for work – you can set it up so that it will automatically switch off when you’re away from home. This Home and Away Aware feature provides savings on your energy bills, as the system won’t be running all day when you’re not at home. There’s also a utility cost estimator, so you get an idea of what your bill will be before it’s even sent to you.

Appearance

Obviously, the Kono is a lot more than just a pretty face, but you can’t ignore the fact that this is a good looking device. Kono puts an emphasis on personalization with its changeable Décor-snap covers, so it can blend in seamlessly or stand out and make a statement.

And if they don’t have the color you want? No problem! They even give you the option of painting a blank one. It can’t get much more personal than that.

Available Covers

Compatibility

The Kono works seamlessly with Amazon Alexa, Google Assistant, and Apple Homekit, and comes with clear instructions for a seamless integration into your home. Even without one of these devices, you can still control it from the app on your phone. 

Powered by the C-Wire or LUX Power Bridge, the Kono can even control your forced air, oil, gas, electric furnaces and heat pump systems. There’s a whole lot of flexibility.  The C-Wire bridge is a fantastic feature of this product.  It allows you to use this thermostat even when you don’t have what they call a C-wire (Common Wire).   

Price

If you have a budget or don’t want to be splashing out too much cash, the price point of the Kono makes it even more attractive. It’s less expensive than most of its competitors whilst still being great at what it does.

Whether your budget is high or low, the price point of the Kono, as well as what its capable of doing, makes it a very attractive option for any smart home setup.

Conclusion

The Lux Kono thermostat is the perfect addition to any home. It’s smart, modern, easy to use, and it looks amazing. For anyone looking for a smart thermostat without spending a fortune, this is a great option to consider.

It has so many great features its difficult to quickly sum them all up. From its sleek appearance and personalization options to its convenience and ease of use, purchasing a Kono is guaranteeing yourself an easier time of controlling the temperature in your home.

Lux have always proved themselves as producers of high-quality products, and they’ve proven it again with the Kono. If you want a smart thermostat that will integrate effortlessly with your modern day life, this is the one you should get.

Products Included in this Article

Senex Technologies - Home Security &Amp; Automation Logo

Review of The August Smart Lock Pro, 4th Generation

August-Smart-Lock-Pro
Q? Encoding=Utf8&Amp;Asin=B082Vxk9Ck&Amp;Format= Sl250 &Amp;Id=Asinimage&Amp;Marketplace=Ca&Amp;Serviceversion=20070822&Amp;Ws=1&Amp;Tag=Senex01 20&Amp;Language=En CaIr?T=Senex01 20&Amp;Language=En Ca&Amp;L=Li3&Amp;O=15&Amp;A=B082Vxk9Ck

Technology is great, isn’t it? We may not have managed to achieve the flying cars our childhood selves dreamed of, but the ability to lock and unlock our front doors with our voice is a huge step toward the futuristic lifestyle we all imagined.

The August Smart Lock Pro is the most advanced of its kind. It connects effortlessly with all the major smart platforms including Apple’s Homekit and Siri, Amazon Alexa and Google Assistant.

It still makes use of all of the popular features from earlier models such as Auto-Unlock, virtual keys, and smartphone control, but also has a brand-new feature called DoorSense. This clever little sensor knows whether your door is open or closed, which is the basis of a whole lot of great features. It will automatically lock the door when you close it, alert you if it opens, alert you if someone forces it open, and monitor how long it stays open.

Sounds useful, doesn’t it? The August Smart Lock Pro packs a punch with its ease of installation and functionality, but there are a few downsides that’ll need to be considered, too. With that in mind, let’s have a look at it in a bit more detail.

Installation

The August Smart Lock Pro has the convenient ability to be fitted straight over a standard deadlock, without having to replace the current lock. This is something that competing designs aren’t able to accomplish and means that the average time it takes to install the lock is just 10 minutes. It also means you can still use your old door keys, which is great as a backup option.

This super-fast 10 minute installation time is helped along by the great instructions provided on the August mobile app. With clear step-by-step instructions and short video clips to show you what to do, you really can’t go wrong. All you need is a Phillips screwdriver and you’re good to go. Just make sure the bracket isn’t screwed too tightly to your existing lock, or the Pro will have difficulty turning. It even comes with color-coded adapters that allows the Pro to be fitted to a number of different brands of deadbolt, and the app will let you know which color you need to use.

The DoorSense feature will only work if you install the additional sensor that’s included. This can either be screwed onto the front of the frame or if you don’t mind doing some drilling, can be flush mounted opposite the lock. The latter looks prettier, but the first option is easier and works just as well.

Once you’ve configured your account, your phone will scan for a Bluetooth connection and connect with the lock before starting the calibration, requiring you to simply lock and unlock the door. DoorSense calibration is done by holding the door at varying level of openness. Lastly, you test the lock, and everything’s good to go.

It’s simple to add other users to the lock, and you can define access levels to restrict certain features and give access to others. Guest accounts can also be enabled for one-off or scheduled visits, which makes it great for cleaners or use with services like Airbnb.

The App

Locking and unlocking your front door shouldn’t be difficult, and August’s brilliantly designed app makes sure it’s as simple as it needs to be. The large button can be tapped to lock or unlock the door, turning bright red when the door is locked and green when it’s open.

If you’re connecting with Bluetooth you need to make sure you’re within 10 meters of the door, but if you have a data connection you have a lot more freedom. The August Smart Pro is also clever enough to automatically unlock your door when you get home, which is great if you have your hands full.  Includes an activity log so you can keep track of all events. 

Smart Home Integration

The Wi-Fi Smart Lock has comprehensive device compatibility.  It works effortlessly with Siri® & Apple HomeKit, Amazon Alexa® and Google Assistant.

Conclusion

The August Smart Lock Pro really is a market leader, and if you’re looking for a smart lock that will seamlessly integrate into your home, this is definitely a good option. It’s easy to install, has good functionality, high security and will make your daily life much more convenient.

There are little niggles to be considered, like the larger size, but this is completely outweighed by all the amazing things this lock can do. It’s connectivity really sets it apart from its competitors, and there really is very little that you can criticize it on.

Products Included in this Article

SenexAutomation.com is a participant in the Amazon Associates Program, an affiliate advertising program designed to provide a means for sites to earn advertising fees by advertising and linking to Amazon.ca or Amazon.com. As an Amazon Associate, I earn from qualifying purchases.