Wi-Fi Camera

GENBOLT Outdoor Camera Review

Genbolt Camera Review

GENBOLT Outdoor Camera Review

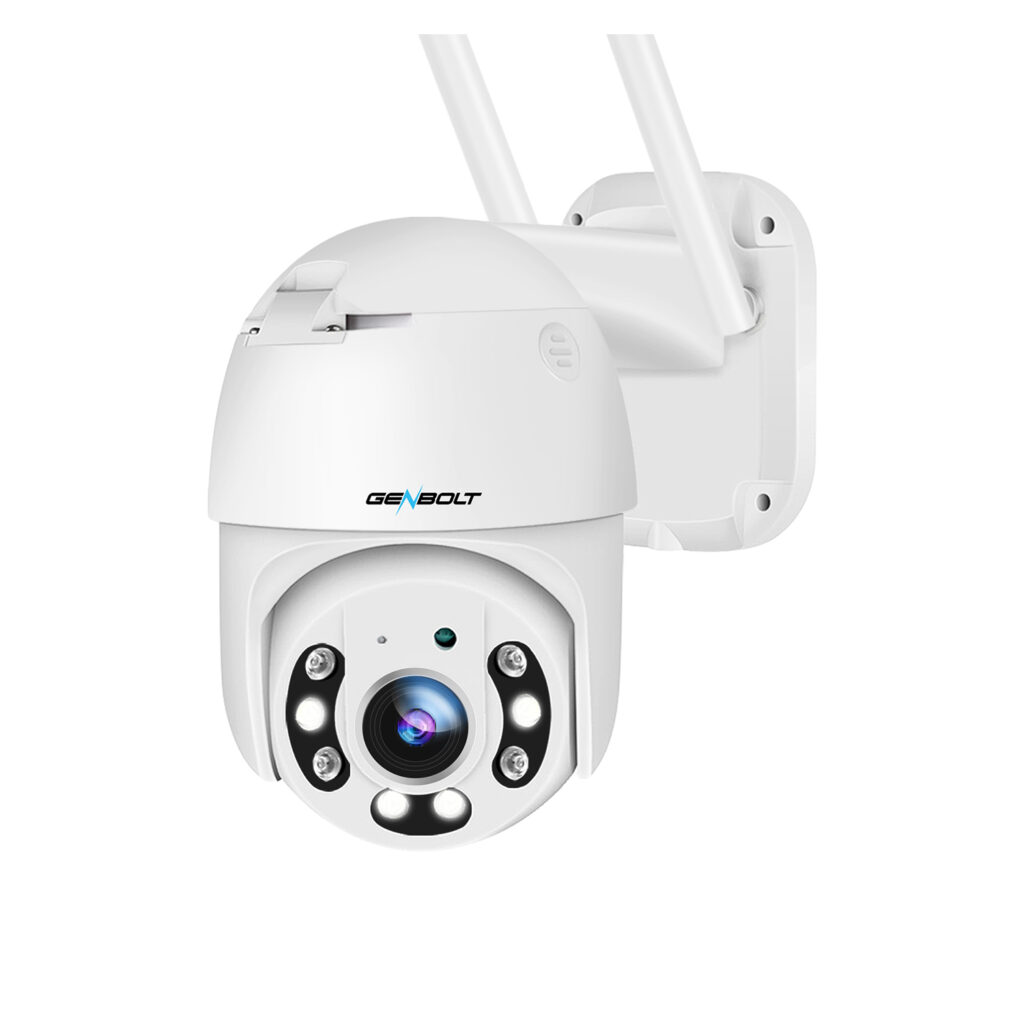
This is an excellent outdoor PTZ security camera with a great design and overall appearance.  

I recently had the chance to unbox and try out the GENBOLT Outdoor Camera GB202 and can honestly say that I was impressed by the construction and overall form.   In this GENBOLT GB202 review, I cover everything you need to know about the basics along with what I consider to be the major pros and cons of this WiFi outdoor camera.

Specifications and Basics

The GENBOLT outdoor camera model GB202 is outdoor rated as IP66 which means it can withstand harsh weather conditions.  An IP66 rating means that it has undergone a 3 minute test of water projected in powerful jets against the enclosure from any direction without causing any harmful effects!  I know if you shot a powerful jets at me for 3 minutes I would certainly have some ill effects.  Anyways I digress. 

The overall size is quite small but you wouldn’t get that from looking at the photos.  It measures approximately 14 x 10 x 12 cm (5.5 x 4 x 4.75 inches).  Some would say this was a mini camera.  I believe it’s a perfect size.  Large enough to be a deterrent and small enough to be aesthetically pleasing.

Overall rotation on the horizontal (Pan) is up to 320 deg and 70 deg on the vertical (Tilt).  This amount of range would be plenty for a field of view in most home or small business applications. 

Communications

The GENBOLT  outdoor camera GB202 can be used with a WiFi network or a hardwired ethernet cable.  I always recommend a hardwired connection where possible. This will provide a better overall user experience.  However, in most applications running cables are difficult so Wi-Fi would be the only option.

The GENBOLT outdoor camera comes with an Enhanced 5dBi WiFi antenna which can provide a range of up to 15m or 50′.  This is in ideal situations with no obstacles between the camera and Wi-Fi router. Your range will vary depending on your particular environment.

The camera only supports the 2.4GHz Wi-Fi band. 5GHz is not possible.  While it’s likely you would be better off using the 2.4GHz anyways (to get the best distance or range), it would have been nice if 5GHz was available in case the camera was close enough to benefit from its use (faster data transmission). 

Using a CAT5 or CAT 6 ethernet cable connection is also an option if you can swing it.   This would give the best overall performance but as we mentioned the most difficult installation. 

For anyone who really feels the need to match the display with their home’s interior design, Amazon offers the unit in white, charcoal, sandstone, deep blue sea and chameleon. There’s also a version with the latter color specifically designed for kids.

Plenty of High-Quality Features
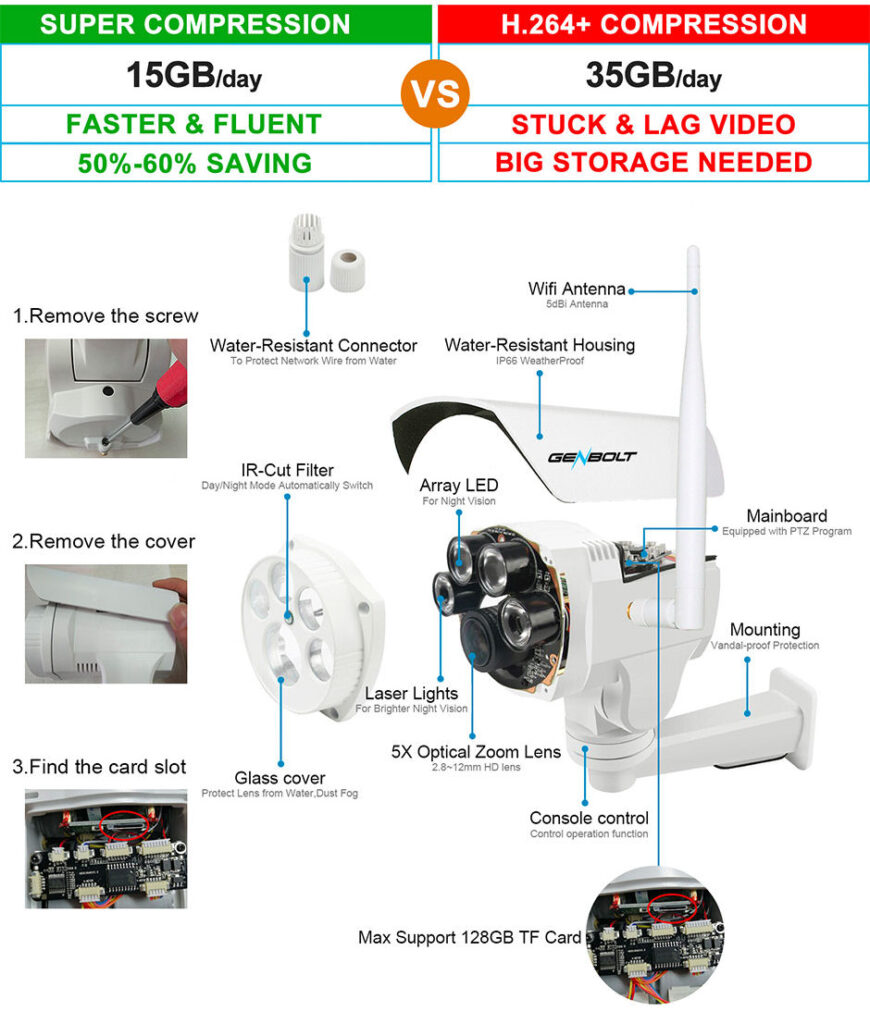
Camera Points

The GENBOLT outdoor camera model GB202 provides a 2MP (1920x1080p) image which these days is not huge but is it does provide sufficient detail for general surveillance.  It would have been nice if this camera provided 4 or 5 MP image at the same great price.

The camera comes with a 2.8-12mm vari-focal lens which is fantastic for camera in this price range.  The 2.8 setting provides a very wide angled view while the 12mm can provide great detail when zoomed in at greater distances.  Best of both worlds.

The camera even has 5x Optical zoom.  Optical zoom  uses a physical change in the lens to adjust the distance between the camera lens and the subject.   This is always the better way to zoom as it provides the best details or image quality.

Digital zoom on the other hand uses technology (software) to manipulating pixels in the image.  While this does provide a larger image it is at the cost of image quality.

The camera does provide an additional 4x Digital zoom on top of the 5x optical zoom. 

The GENBOLT outdoor camera GB202 comes with 8 Presets.  Presets are a great feature in that it allows you to define up to 8 different camera positions that you can call up by simply pressing a button on the app.  For example,  you could create a preset for all your doors, windows or patio. Then when called would move the camera to the same position you set for that particular preset. 

The GENBOLT outdoor camera also comes with an Auto Cruise feature.  When enabled the camera will automatically pan back and forth between presets until you stop it. However, I do not recommend using this feature for long periods.   Leaving this on all the time I believe will wear out the internal gears and mechanism.  I have seen this happen on professional grade systems.  

The camera comes with a Auto focus feature.  When you zoom in it will try to adjust and provide the best focus.  This works but I did find it to be a bit laggy or slow to focus in some situations.  It does eventually find the correct focus.

Night Vison

The GENBOLT outdoor camera GB202 provides above average night vision.  During our test it did provide adequate scenes at the advertised 30M or 100ft .

It accomplishes this by using an array of 4 10 mil IR LEDs. 

Comparing with normal IR LED on other ip cameras, this array of  IR LED’s provides  longer time lifespan and better IR night vision performance.

Recording & Storage

Every camera system needs some sort of recording and storage capability.  The GENBOLT outdoor camera GB202 can be setup to record based on a schedule or by alarm detection events.  I prefer the alarm detection method as this will reduce the amount of storage needed as it records only when something is detected.  Of course you could also set it up to record all the time or by a schedule.

Storage of video events can be done directly on the cameras built-in 32GB TF Card (memory card).  I was surprised to find that they included a built-in card as most manufactures only provide a SD card slot and you have to supply a SD card.  With the built-in card you can start storing your video right away.

However, they also provide a SD card slot so you can add additional storage capability by adding a 32, 64 or 128GB SD card (not provided). 

Playback and searching your stored video was also easy and intuitive .  The App allows you to find your recorded events by using the timeline or by specific dates using the calendar.  

Alarm & Detection

False alarms from standard camera detection can be extremely annoying.  Things like plants moving in the breeze, snow, rain, dog, moth, fog, leaves falling, and lights from cars passing by can cause standard detection systems to false alarm.  The GENBOLT GB202 comes with AI humanoid alarm detection.  The camera sensor will only send you notifications when it detects a humanoid form in the field of view.  This helps to reduce false alarms and the constant annoying notifications.  During my tests I found it to be pretty accurate.

This camera also comes with Intelligent auto tracking technology, the GB202 will track or follow people’s path automatically once they  enter the surveillance area.  This is a very cool feature and I found it to work pretty well during our tests.  However, like any tracking system you can out run the tracking just by moving very fast.  In this scenario the camera will lose track of the person and return to its home position.   However, I would think that most intruders would not be sprinting across the field of view (FOV).

You can also set a schedule for your alarm detection to operate.  For example, you could setup detection to work only between certain hours and specific days. 

Motion detection zones are also available.  This allows you to set a specific area of your view that will generate alarms.  This worked flawlessly.  I could set an area or zone and only if I entered that area would the camera detect and send alarms.   Great for masking out areas that might have movement that you don’t want to detect.

Notifications

The GENBOLT outdoor camera GB202 Wi-Fi camera can notify you of detection events by email and/or by notifications on your phone.    You can set it up to send your multiple live photos with an event occurs.

FAQ

How do you power the camera?

The camera comes with a 12Vdc 1.5amp power adapter that needs to be plugged into a standard household receptacle.  The adapter is not rated for outdoors so it should be placed indoors close to the camera.  Thc cable is approximately 3 meters long but you can also purchase extension cable if needed.

The camera does not support Power over Ethernet (POE)

Do I need a Internet Connection?

Yes . To be able to use the GENBOLT outdoor camera GB202 you will need a WiFi or Ethernet network (hard wired) with Internet connectivity.  

Are there any monthly fees?

No.  No monthly fees if you use the onboard memory card.

Can I mount this on a corner of my house?

Yes.  But you will need to purchase an corner mount bracket.  We have provided a suitable bracket below.

Pro's & Cons

During my review I have identified the following Pros and Cons 

Pros

  • A lot of features at a reasonable price
  • Better than average video storage options
  • IP66 Rated for harsh weather conditions
  • 5x Optical zoom compared to just digital zoom.

Cons

  • No Alexa or Google Home support.  
  • Only 2 MP image compared to many cameras being 4 or 5MP theses days.  
  • Plastic housing compared to more professional grade cameras that use metal

Alternatives

Conclusion

During the testing of the GENBOLT outdoor camera GB202 I found it to be above average for cameras in that price range.  While there is room for improvement, like the smaller image size (2 MP),  not working with smart speakers like Alexa and Google Home and the plastic housing.  I did find overall that this is a good choice for general home surveillance.  With good image quality and above average night vision I don’t think you can wrong with this camera.

Update Feb 17,2023

After using this camera now for a while I just had to post this update with my experience.  In short this camera has exceeded my expectations for a camera in this price range.  It has been very reliable and all the features seem to work as described all the time.  In my experience some other cameras in this range sometimes become quirky with some features stopping to work and/or becoming inconsistent.  Not this camera, it works as it should all the time.  I really like the night vision which actually works as they described.  Overall I very pleased with this camera.

Products Covered in this Article

Foscam SD2 Wi-Fi PTZ IP Camera Review

Sd2-Camera-Review

Foscam SD2 WI-FI PTZ CAMERA REVIEW

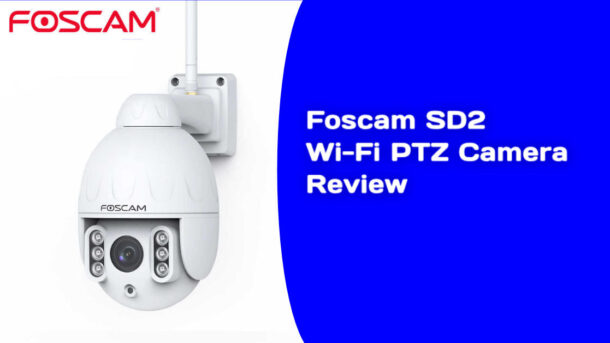
In this review we will look at the Foscam SD2 1080p Wi-Fi PTZ camera.  

What you get

You get everything you need to get your camera setup. 

  • PTX Wi-fi Camera
  • 12VDC power adapter
  • Ethernet Network Cable
  • Wi-Fi Antenna
  • Mounting Bracket
  • Mounting template
  • Small Philips screwdriver
  • Waring decal
  • Connector Protector
  • User’s Manual

The camera shell is made of metal not plastic and the cable leads were longer that normal which makes it much easier to pass through walls.  The power adapter is listed for use in Canada and the USA. 


Foscam What You Get

How does the Camera work?

To perform this review I first setup the camera on the bench.  There’s really not much to the installation.  Just plug the power adapter into a wall outlet and the 2.5 mm plug into the power lead on the camera.  There are two leads coming from the camera. Power and Ethernet network connection.  Once plugged in the camera began its startup sequence which includes panning and tilting and then finally coming to rest.  This all took about 10 seconds.

Next I installed the Foscam App from the App store (Android).  Created an account and was ready to add my first device/camera.  The App installation was a simple process with no surprizes.  However, they do try to sell you on their paid cloud service.  

To connect the camera I decided to use the camera’s hardwired Ethernet connection.  I Plugged in the provided network cable into the camera then my router.   I was very surprised to see network status LED’s on the cameras connector which is a nice feature.  The camera also announced, in English,  that it connected to a wired connection.  This certainly takes the guess work out determining if you are connected or not.

Next I followed the provided instructions and selected the Add Device icon (+) on the APP and then scanned the QR label situated on the cameras bracket.  The App picked up the code before I could even get the phone camera lined up with the label.  The next thing I knew the camera was connected using the Ethernet hardwired connection.

At this point the App recommended that I connect the camera using Wi-Fi. Since I always do what I’m told,  I selected the Configure Wi-Fi button.  I picked my Wi-Fi network from the list and provided the password and  selected Connect.  As expected I received confirmation that the camera was added successfully in about 10 seconds. I then completed the setup by naming the camera and configuring a camera username/password.  Once all the above was done I finally got live video from the camera. 

Now that the camera is setup and I’m getting video I proceeded to test its many features/functions.  Here is what I found.

Video Quality

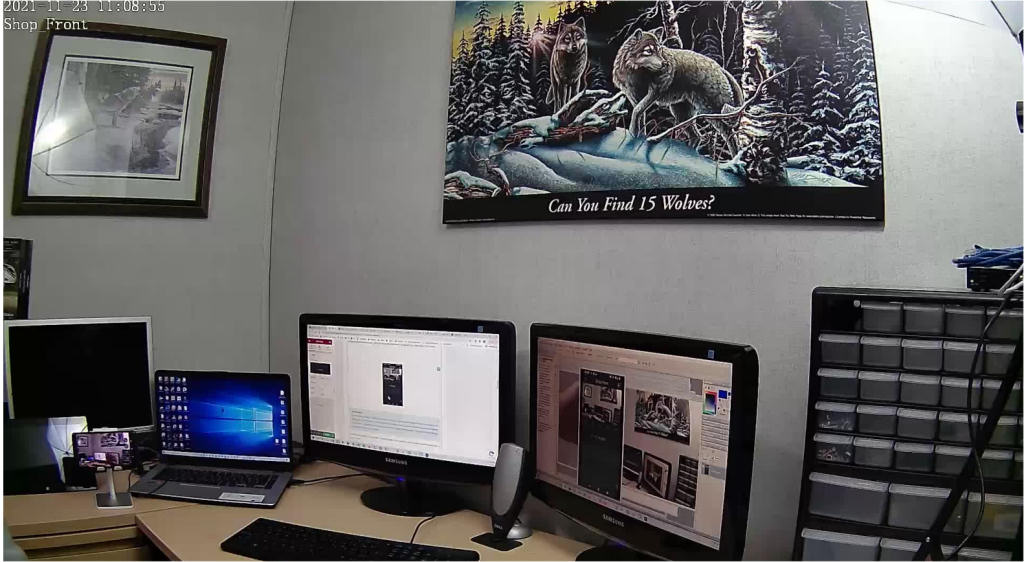
 As you can see from the screen shots the video quality was very good. The Landscape orientation provided an exceptional image which I was happy with.  The camera was set to provide Standard Definition (SD) in the first screenshot and Full High Definition (HD) in the second.  

SD Landscape

Sample Image Of Sd2 Camera View

HD Landscape

Sample Image Of Sd2 Camera Landscape View Of Desk

The only recommendation I would have regarding the video quality would be that the WDR functionality could use some improvements.  I found that if you had a very high contrasted scene (camera looking at a window) the camera would have difficulties handling it and you would end up with some of the image too dark to make anything out.

Pan/Tilt control

The the pan and tilt control of the camera was excellent and it did not exhibit any lagging.  When you release your touch it immediately stopped which made it easy to get the desired image.  I especially liked the way they handled the touch control. Once you touch and swiped you can keep the pan or tilt active for as long as you maintain touch.  It made for a smoother user interface and better control.  The pan/tilt was very smooth with almost no motor noise. 

Sound Detection

The sound detection worked well.  You can set the detection level to one of 5 levels (Lowest, Lower, Low, Medium, High).  It would send notifications to my phone when ever it heard adequate sound in its area.  It also save a short video of what it saw during the sound alarm in the SD Card area.  It was nice to see a list of alarms to choose from and view just by clicking on one. In a way,  I kind of like this method of play back over the standard sliding timeline.  

Motion Detection

Motion detection worked great. Here too you can set the sensitivity to one of 5 levels (Lowest, Lower, Low, Medium, High).    This wide range in sensitivity would come in very useful when dealing with false motion detection due to bugs, leaves, trees and other similar items.  I had to lower the setting to the Lowest setting to get my camera to stop sending false detection alarms. 

AI Human Detection 

You have the option of using standard Motion Detection (above) or AI Human Detection but you cant have both enabled at the same time.  The Human Detection we are testing here is done on the device as apposed to their more advanced online cloud services.  It is supposed to distinguish between human and non-human objects.  To test the AI Human detection I first setup the camera with standard Motion Detection and pointed the camera at a scene that had some plants that where moving due to a light breeze.  The motion alarm was constantly being activated as it picked up the plant moving (I had this set to highest sensitivity).   I then set the camera to AI Human detection with the same scene and monitored.  It was disappointing to see that it continued to generate motion alarms even without anyone entering the field of view.   I expected all detection alarms to stop as there wasn’t anything remotely resembling a human in the scene.  I found this strange so  I contacted their support team just to ensure that I hadn’t setup something wrong that caused this but I never received a reply. 

We also tested the AI Human Detection in a real life environment.  It was installed on a home looking at a large driveway.  When we walked into the view it seemed to work better and it identified us as human and sent a proper notification.  This would be a great feature to prevent false detections as would normally be endured with standard motion detection (bugs, leaves, trees etc.).

Cloud Storage

I normally do not test the online cloud services when I do reviews but in this case I thought I would subscribe and check out their AI Recognition Reminder.  Not sure why they called it a Reminder but in any case according to the documentation its supposed to identify the differences in packages, human bodies, pets and vehicles.  So I went ahead and signed up for the Free 30 day trial subscription.  The sign up was super easy which I did right from the App by selecting the MyPlan icon from the settings screen. 

The cloud video storage worked flawlessly.  If an alarm was tripped it stored the video in the cloud and I was able to easily view the events.  The playback interface was very responsive and didn’t exhibit any lagging or stuttering.  The provided sliding time line displayed all my alarm events and I was able to zero in on the exact video I was looking for.

I then proceeded to test the the Cloud AI Recognition features (Packages, Human, Pets and Vehicle) starting with Human Detection.  Please note that the AI detection features being tested here are those performed on the cloud service not locally on your camera.  How this works is that the camera sends the video to the cloud service which will then analyse the video to determine if its a package, vehicle, pet or human.  If detection is successful it will push a notification with the detected type to your phone.   

Note:  In the App they provided a list of cameras and countries that supported the Cloud AI Recognition features.  The SD2 camera was not listed and neither was Canada.  I sent a request to Foscam support to confirm if its officially supported and have not yet received a response.  I will update this review if/when I do get a response. However, despite not be listed as supported it still worked.  

I setup the camera with a full view of me walking towards the camera.  I walked at a normal pace towards the camera and I got varying results.  Sometimes it detected me and pushed a notification and other times it didn’t detect me at all.  In most cases it would detect me but would push a generic notification “Motion detection alarm”.  The distance from me and the camera was about 12′ or 365 cm.

Next I tried the Package detection feature.  I setup the camera to view a counter on which I would place a box (approx. 12″ x 12″) and walked away.  Again, it was not able to detect the package all the time and most of the time I got a notification saying “Motion detection alarm” without it specify that it was a package.

Next up was the vehicle detection.  I pointed the camera at a empty spot in a driveway.  We then had a vehicle park in the cameras FOV.   It did pick up the vehicle and sent a proper notification.

So I would have to say that the AI detection is probably about 90% reliable but I would also believe that different environments could provide different results.

Would I subscribe to this cloud service even without these features?  Well I would if I needed to store longer periods of video that couldn’t be handled by the on board SD Card.    

Play Back from SD Card

The camera has the ability to record video on a SD card that you insert into the back of the camera.  I had a 32GB SD card lying around so I installed it into the camera (SD cards are not included with camera).  I then proceeded to cause some motion and sound alarms.  With each alarm I received a notification on my phone and a new recording stored within the SD Card section of the App.  The way they organize the alarm recordings is by using a simple list with the type of alarm recording (Sound, Motion or Human Detection) along with the time of the alarm and a video clip.  This made it easy to find the event I was looking for.  When you open an alarm event it provided a playback view where can easily view the alarm video. You also have the ability to jump forward or backwards within the video clip. The video playback was excellent.   You can even download the videos for long term storage.   I was very happy with the SD card storage feature.

Sharing 

If you want to share your cameras you can do that too.  You just need to go to the Share Camera menu option and add the account you want to share with.  The person will need to have an account setup prior to using this feature.  The App wont send an invite to them which I think could be a great feature for the manufacturer to add.

IR Night Vision

As with any camera I find the IR illumination range mentioned in the specifications rarely line up with reality.  In my test I estimate the IR illumination for the SD2 would reach approx. 10m in my environment.  

Pan/Tilt control

The the pan and tilt control of the camera was excellent and it did not exhibit any lagging.  When you release your touch it immediately stopped which made it easy to get the desired image.  I especially liked the way they handled the touch control. Once you touch and swiped you can keep the pan or tilt active for as long as you maintain touch.  It made for a smoother user interface and better control.  The pan/tilt was very smooth with almost no motor noise. 

Sound Detection

The sound detection worked well.  You can set the detection level to one of 5 levels (Lowest, Lower, Low, Medium, High).  It would send notifications to my phone when ever it heard adequate sound in its area.  It also save a short video of what it saw during the sound alarm in the SD Card area.  It was nice to see a list of alarms to choose from and view just by clicking on one. In a way,  I kind of like this method of play back over the standard sliding timeline.  

Motion Detection

Motion detection worked great. Here too you can set the sensitivity to one of 5 levels (Lowest, Lower, Low, Medium, High).    This wide range in sensitivity would come in very useful when dealing with false motion detection due to bugs, leaves, trees and other similar items.  I had to lower the setting to the Lowest setting to get my camera to stop sending false detection alarms. 

AI Human Detection 

You have the option of using standard Motion Detection (above) or AI Human Detection but you cant have both enabled at the same time.  The Human Detection we are testing here is done on the device as apposed to their more advanced online cloud services.  It is supposed to distinguish between human and non-human objects.  To test the AI Human detection I first setup the camera with standard Motion Detection and pointed the camera at a scene that had some plants that where moving due to a light breeze.  The motion alarm was constantly being activated as it picked up the plant moving (I had this set to highest sensitivity).   I then set the camera to AI Human detection with the same scene and monitored.  It was disappointing to see that it continued to generate motion alarms even without anyone entering the field of view.   I expected all detection alarms to stop as there wasn’t anything remotely resembling a human in the scene.  I found this strange so  I contacted their support team just to ensure that I hadn’t setup something wrong that caused this but I never received a reply. 

We also tested the AI Human Detection in a real life environment.  It was installed on a home looking at a large driveway.  When we walked into the view it seemed to work better and it identified us as human and sent a proper notification.  This would be a great feature to prevent false detections as would normally be endured with standard motion detection (bugs, leaves, trees etc.).

As our camera was not listed as being supported we did not test the Cloud AI Detection but You can watch a video about their cloud AI Human Detection here.

Cloud Storage

I normally do not test the online cloud services when I do reviews but in this case I thought I would subscribe and check out their AI Recognition Reminder.  Not sure why they called it a Reminder but in any case according to the documentation its supposed to identify the differences in packages, human bodies, pets and vehicles.  So I went ahead and signed up for the Free 30 day trial subscription.  The sign up was super easy which I did right from the App by selecting the MyPlan icon from the settings screen. 

The cloud video storage worked flawlessly.  If an alarm was tripped it stored the video in the cloud and I was able to easily view the events.  The playback interface was very responsive and didn’t exhibit any lagging or stuttering.  The provided sliding time line displayed all my alarm events and I was able to zero in on the exact video I was looking for.

I then proceeded to test the the AI Recognition features starting with Human Detection. Please note that the AI detection features being tested here are those performed on the cloud service not locally on your camera.  How this works is that the camera sends the video to the cloud service which will then analyse the video to determine if its a package, vehicle, pet or human.  If it is successful it will push a notification with the detected type to your phone.   You can watch a video about their 

I setup the camera with a full view of me walking towards the camera.  I walked at a normal pace towards the camera and I got varying results.  Sometimes it detected me and pushed a notification and other times it didn’t detect me at all.  In most cases it would detect me but would push a generic notification “Motion detection alarm”.

Next I tried the Package detection feature.  I setup the camera to view a counter on which I would place a box (approx. 12″ x 12″) and walked away.  Again, it was not able to detect the package all the time and most of the time I got a notification saying “Motion detection alarm” without it specify that it was a package.

Next up was the vehicle detection.  I pointed the camera at a empty spot in a driveway.  We then had a vehicle drive into view and park in the cameras FOV.  

Last but not least I tested the Animal detection.  The start of our test was Racer.  

So I would have to say that the AI detection is probably just not there yet and that you cannot rely on it to notify you 100% of the time.

Would I subscribe to this cloud service even without these features?  Well I would if I needed to store longer periods of video that couldn’t be handled by the on board SD Card.    

Play Back from SD Card

The camera has the ability to record video on a SD card that you insert into the back of the camera.  I had a 32GB SD card lying around so I installed it into the camera.  I then proceeded to cause some motion and sound alarms.  With each alarm I received a notification on my phone and a new recording stored within the SD Card section of the App.  The way they organize the alarm recordings is by using a simple list with the type of alarm recording (Sound, Motion or Human Detection) along with the time of the alarm.  This made it easy to find the event I was looking for.  When you open an alarm event it provided a playback view where can easily view the alarm video. You also have the ability to jump forward or backwards. The video playback was excellent.   You can even download the videos for long term storage. 

Sharing 

If you want to share your cameras you can do that too.  You just need to go to the Share Camera menu option and add the account you want to share with.  The person will need to have an account setup prior to using this feature.  The App wont send an invite to them which I think could be a great feature for the manufacturer to add.

IR Night Vision

As with any camera I find the IR illumination range mentioned in the specifications rarely line up with reality.  In my test I estimate the IR illumination for the SD2 would reach approx. 10m in my environment.  

Features

Compact size PTZ
350 degree pan / 90 degree tilt
2.8~12mm lens (4X optical zoom)
6X digital zoom
Colour day vision
Night vision with IR illumination up to 50M
IR cut filter, 6 LEDs
Ethernet connection
Wi-Fi 2.4 & 5 GHZ 802.11 b/g/n/ac
Free iOS and Android apps
Cloud recording available
CD card slot for local recording
Powered by included 12VDC 2A plug-in power supply
Wide Dynamic Rage (WDR)
IP66 outdoor rated
Rated to -20C.

FAQ

Does this camera support ONVIF?

Yes.  This camera does support the ONVIF standard.

Can I view video from the camera when on vacation?

Yes . As long as you have a suitable Internet connection you can view video and control this camera from any where.  

Can I record video?

Yes.  You can record video using the onboard SD card or you can subscribe to their online cloud (paid service) service.  Both methods will let you search and playback video.

Is it compatible with Google and Alexa?

Yes.  It is compatible with both Alexa and Google.

Can I install and view multiple cameras?

Yes.  You are limited only by your home network bandwidth.  

Pro's & Cons

During my review I have identified the following Pros and Cons 

Pros

  • Good price for a camera of this quality level
  • No cloud service required as you can store and retrieve video on/from the SD card
  • Onboard storage of video using a SD card
  • Night vision
  • Supports Wi-Fi and wired Ethernet connection

Cons

  • No auto tracking.  
  • Cloud AI Detection needs some improvement
  • Camera Human Detection needs improvement
  • Usable night vision was only 10m 
  • Very difficult to connect the camera to WiFi.  Would take multilpe resets before connecting.

Conclusion

As you can see from our testing there are a number of areas where this camera could be improved but it did perform adequately in most environments.   Based on its low price price point and the available features this may be a camera worth considering.  However,  their lack of response to my support requests would raise some concerns.  Based on the performance and the lack of customer support I would recoemend looking at other models or brands in this price range. 

Specifications

Manufacturer Foscam
Place of Business USA
Batteries Not required
Item model number SD2
Dimensions 180mm x 111mm x 180mm
7.1" x 4.37" x 7.1"
Colour White
Lens 2.8~12mm lens (4X optical zoom)
Display Resolution 2.0 megapixels (1920x1080)
Image Compression H.264
Storage Micro SD card (max 128GB), local, FTP, NVR & Cloud storage
Wireless Standard IEEE802.11b/g/n/ac
Wireless Security WPA,WPA2
Network Protocols IP, TCP, UDP, HTTP, HTTPS, SMTP, FTP, DHCP, RTSP, ONVIF
App Foscam App
Power Source 120VAC Adapter - 12VDC 2A Output
Mounting Type Surface Mount
Usage Indoor/Outdoor use
Temperature -20c ~ 50c
-4°F~122°F
Included Components PTZ Camera x 1, Power Supply X 1, Mounting Accessories
Warranty Description 1 Year Manufacturer

Products Covered in this Article

Other products you may be interested in

SenexAutomation.com is a participant in the Amazon Associates Program, an affiliate advertising program designed to provide a means for sites to earn advertising fees by advertising and linking to Amazon.ca or Amazon.com. As an Amazon Associate, I earn from qualifying purchases.